I – Towards the management of diversity in the classroom
I.1 – This handbook
I.2 – The DIVERSE project
I.3 – The current challenges
I.4 – Opening up the classroom
II – Drama in Education
II.1 – Introduction to the theory
II.2 – Description of the method
II.3 – Three lesson plans
II.4 – Some more tools
II.5 – Resources
III – Digital storytelling
III.1 – Introduction to theory
III.2 – Description of the method
III.3 – Three lesson plans
III.3.1 – Discover Scratch: first steps (all ages)
III.3.2 – Poetry with Scratch (activity for primary schools)
III.3.3 – Hack your window (all ages)
III.4 – Some more tools
III.5 – Resources
IV – Folktales
IV.1 – Introduction to theory
IV.2 – Description of the method
IV.3 – Two lesson plans
IV.4 – Some more tools
IV.5 – Resources
V – References
III.3.3 - Hack your window (all ages)
– Estimated duration: 60 min.
– Age: +8 years old.
– Materials and technological resources: computers (1 per team), Internet connection, a device to take photos (camera, cel phone, etc.).
– Teams: family activity at home.
Activity goal: to create a digital story with Scratch and a photo of a window at home.
To take into account: this activity was designed during the confinement due to the COVID19. It is specially designed as a family activity to be conducted at home, but also can be adapted for schools.
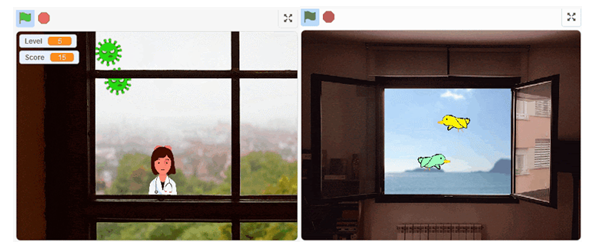
Activity description: take a picture of a window at home, and using Scratch, turn it into a computer game, or into an animated story, an art project, etc. The possibilities are endless, you just have to imagine. Complete tutorial: https://hackart.eduard.cat/2020/03/hack-your-window.html
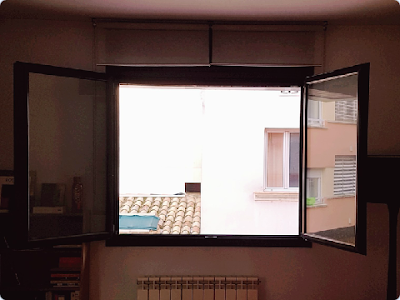
Step 1: Take a picture of your window
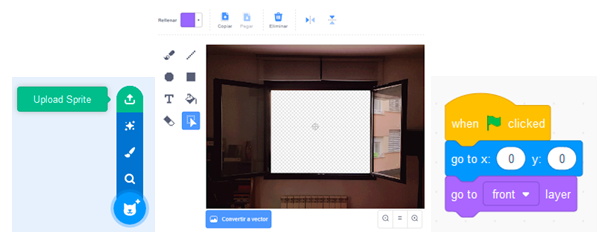
Step 2: upload the photo and open it with Scratch
Go to Scratch, create a new project, and add your photo as a new sprite from your computer. Now, go to “costumes”, and with the paint editor you can modify the photo, for example we can cut out the inside part of the window, to make things happen inside. Then you can program this sprite to centre it and send it to the front (so the other sprites will pass behind).
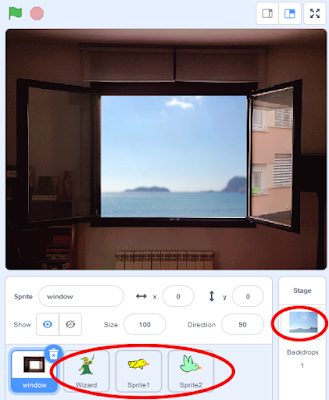
Step 3: add a stage and other sprites
In this example we have emptied the inside part of the window, and now we can put in some more beautiful views. We could use a photo of us, a drawing, a landscape from Internet, etc. Add it to the Scratch project as a stage, then add other sprites! In this example I added two birds and a wizard.
Step 4: create the story (or game, or art…)
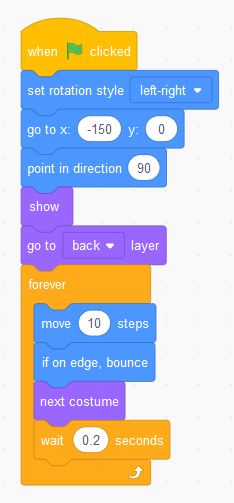
When you have all the elements, now comes the really fun part: explore how to program them to make things happen in your project. For example, make the sprites move, talk, draw… Don’t be afraid of making mistakes! For example, my birds move like this:
Important: when you finish your project, share it on the Scratch website, and then add it to this studio, so everyone can see it, and your project can inspire others.
And if you share it on social networks, please use the hashtags #HackYourWindow i #ScratchAtHome.
