In the following, we will describe different ways to create characters (sprites) and backgrounds (backdrops) in Scratch, from using directly the Scratch digital editor, to importing drawings made with pencils, markers, cardboards and brushes. We will also discover how to create costumes, which will allow us “to bring life” to the characters. The Scratch Editor has two modes of operation: vector and bitmap. To create characters with the editor we will use the vector mode which is more versatile and allows us to create drawings in a simpler way. We will use the bitmap mode when we import images and we want to modify them. The bitmap mode is the mode where you paint pixels, that’s why many times the sprites created with this mode have a pixelated aspect.
From Scratch gallery / Scratch editor
When you open Scratch with a new project, a sprite appears by default: The Scratch cat (that’s its name). To create a new sprite, you have different options.
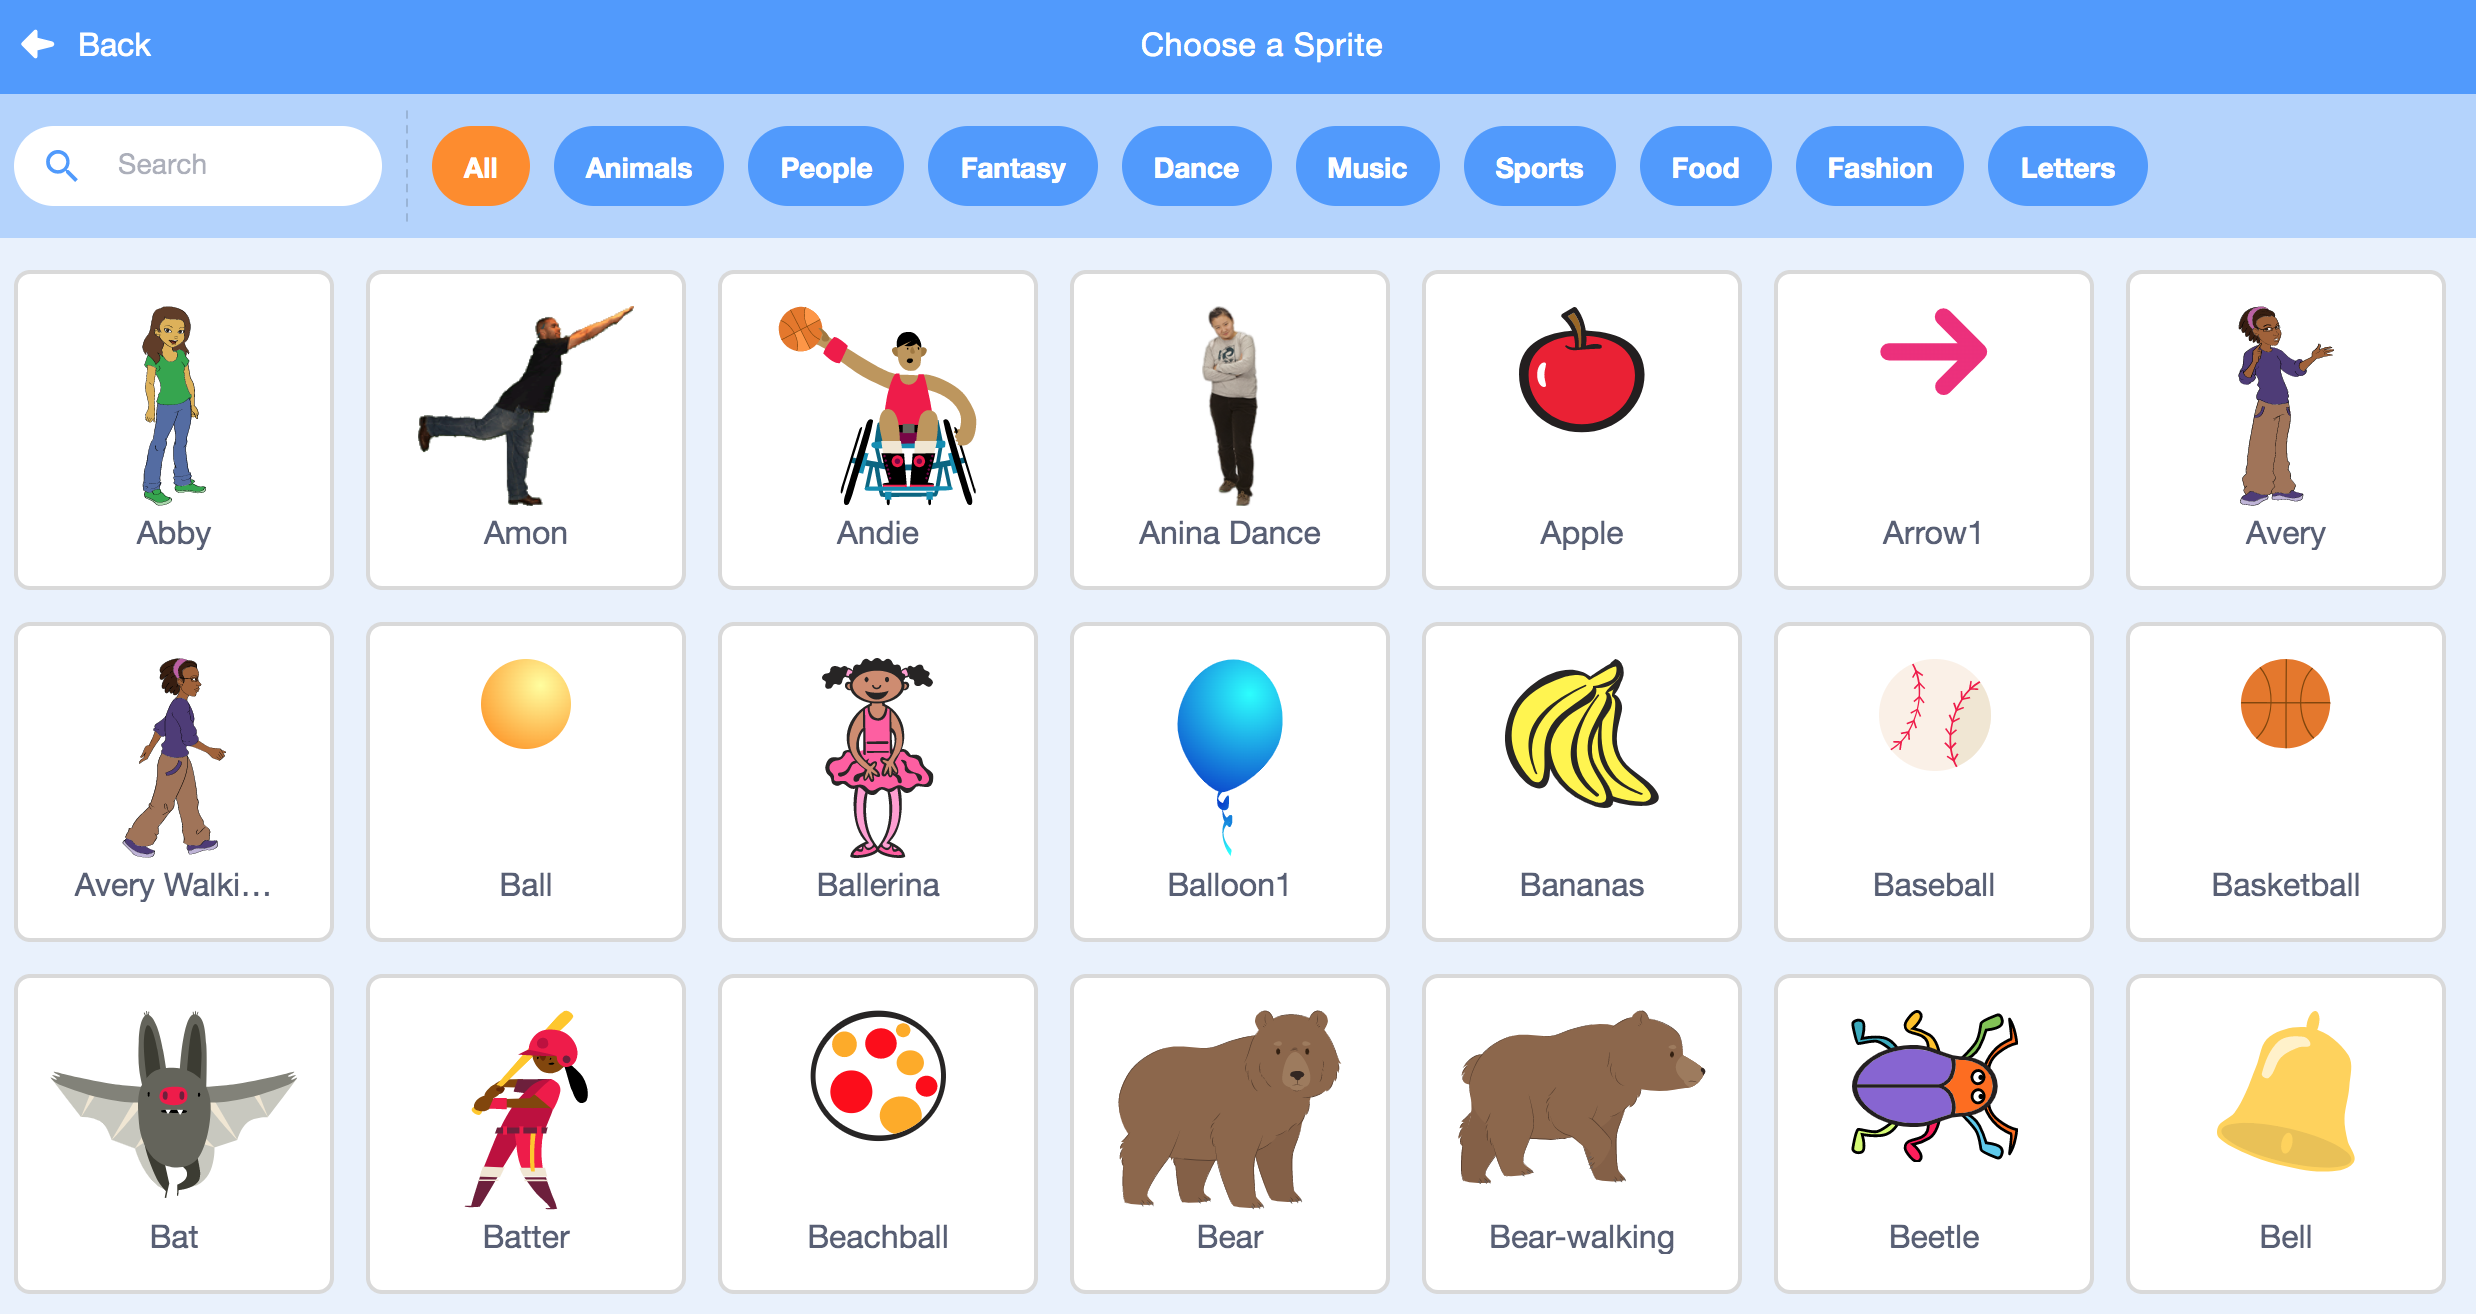
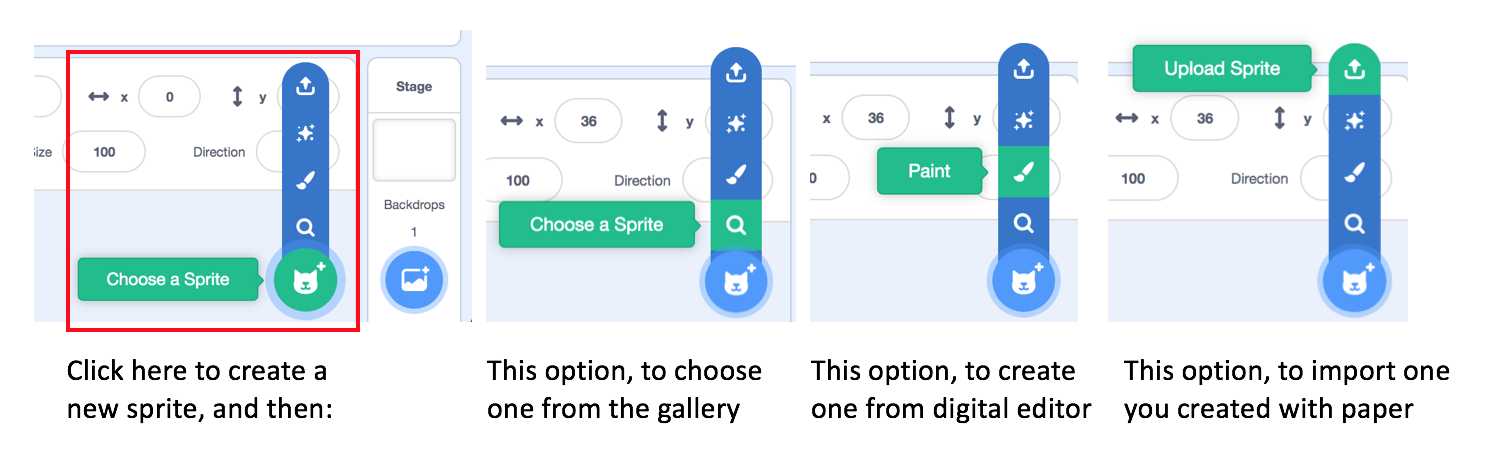 The simplest, to choose one sprite from the gallery. When you click on this option a menu appears with different possibilities: at the top there are some labels to help you select a sprite. For example, if you click on “animals”, only all the sprites that are animals will appear.
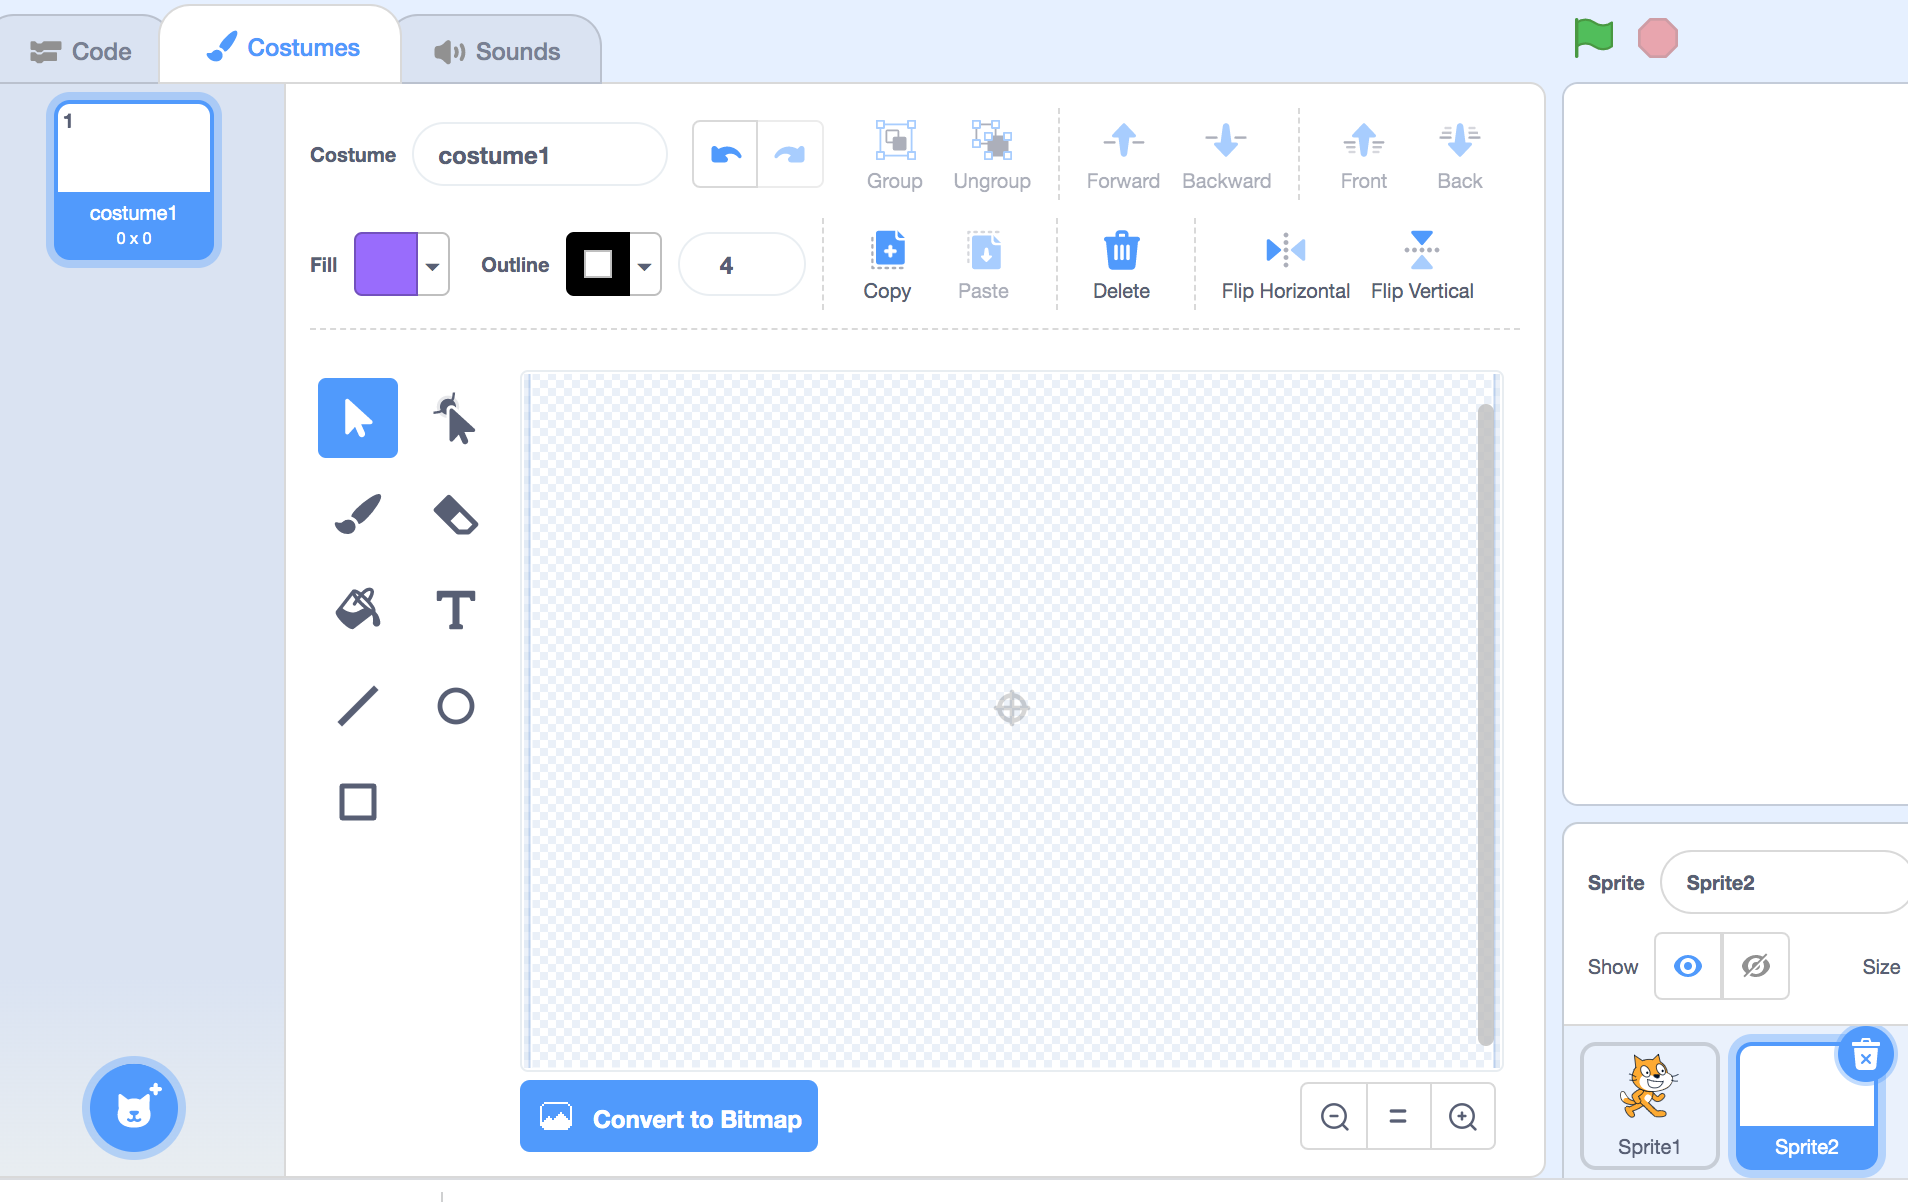
But if we want to create your own character, Scratch also makes it very easy. Let’s start with the option to draw the character directly with the Scratch graphics editor. For this option, click on the brush icon (paint option), and the left part of the screen will become the graphic editor.
Let’s start by drawing the Polyphemus face. We’ll do it step by step. We will work with circles and we will deform them to draw the eye, the face and the hair. We select the circle and create one.
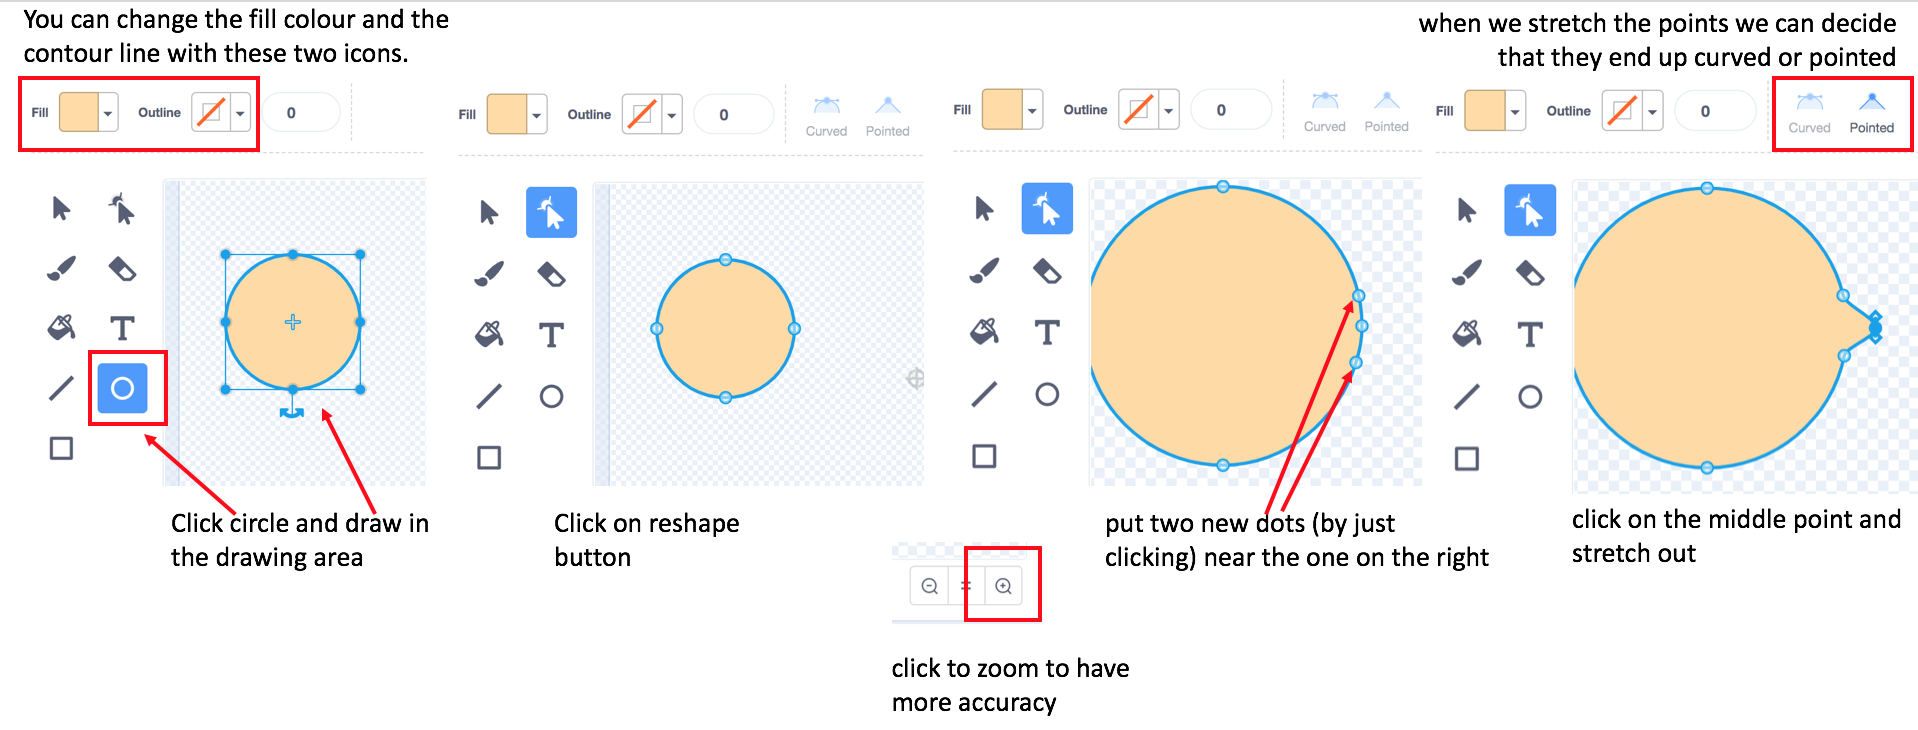 We repeat the same process for the other side. We can select the colour we like best by selecting the shape and clicking on the fill colour: play with the colour, saturation and brightness bars. Following a similar process, we created the eye, and the hair.
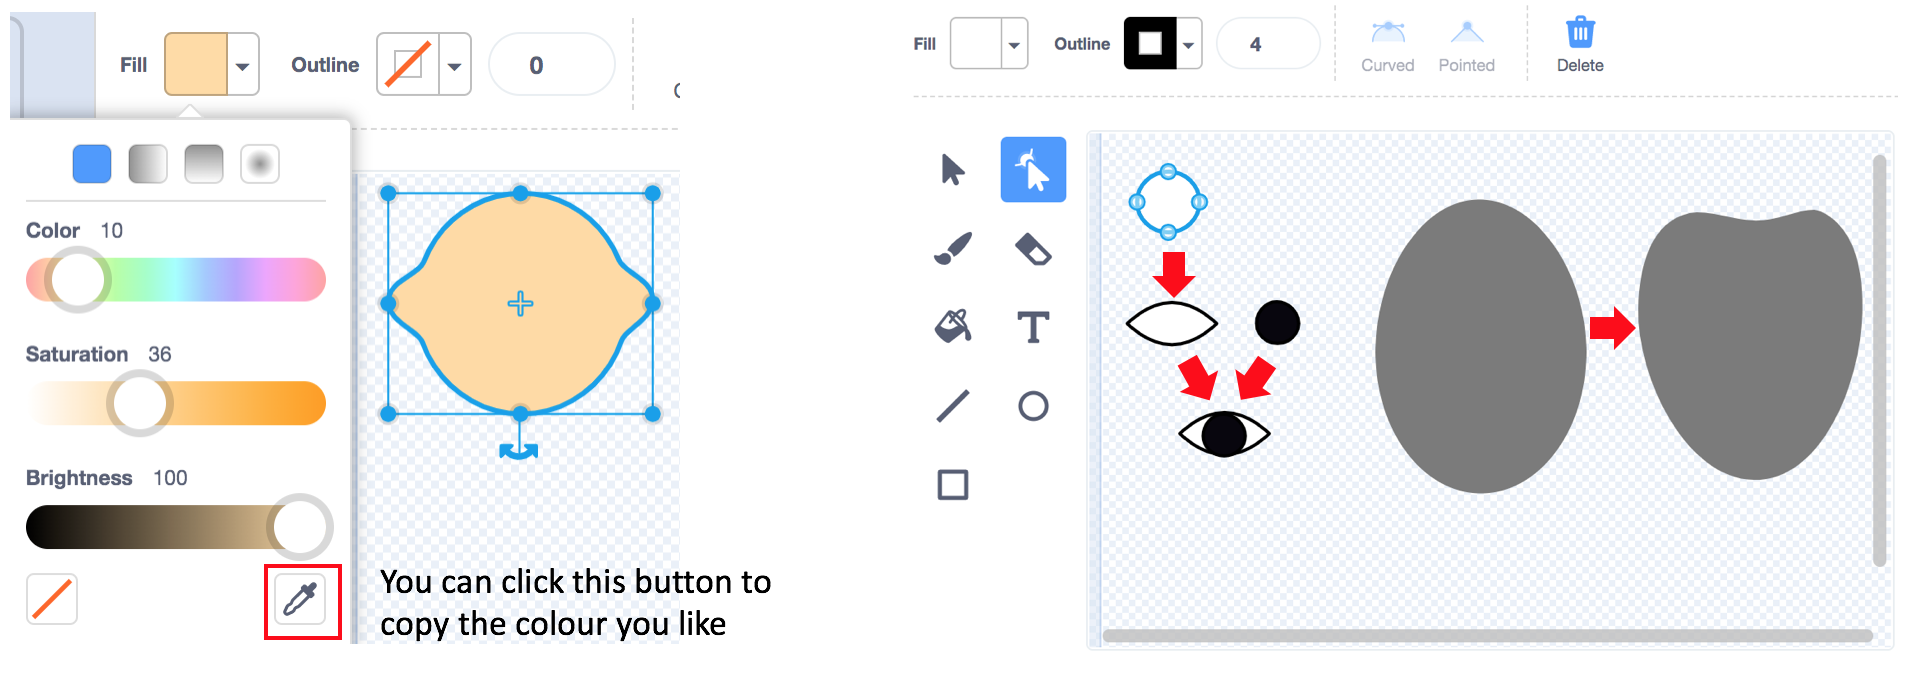
By selecting the different shapes, we can move them and place them wherever we want. With the layer buttons, we can put each of the shapes in front or behind the others. We can also use the copy & paste buttons, and flip to rotate and transform the shapes. We can also select several shapes and group them with the group button, and from here it will be a group. For example, the eye is made up of two shapes, which we can group together to make it more consistent.
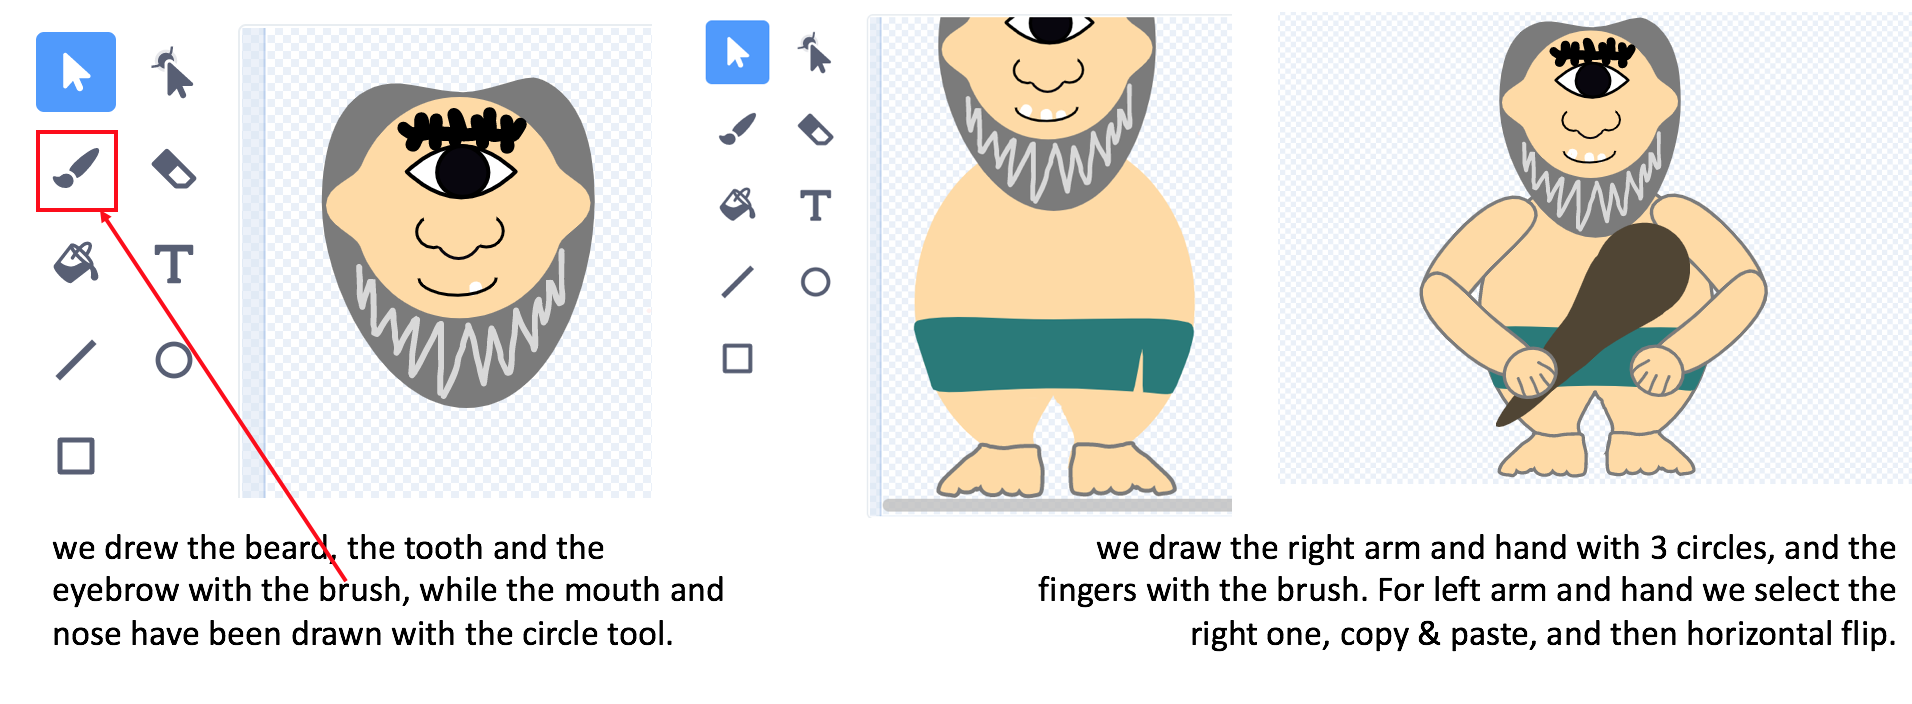
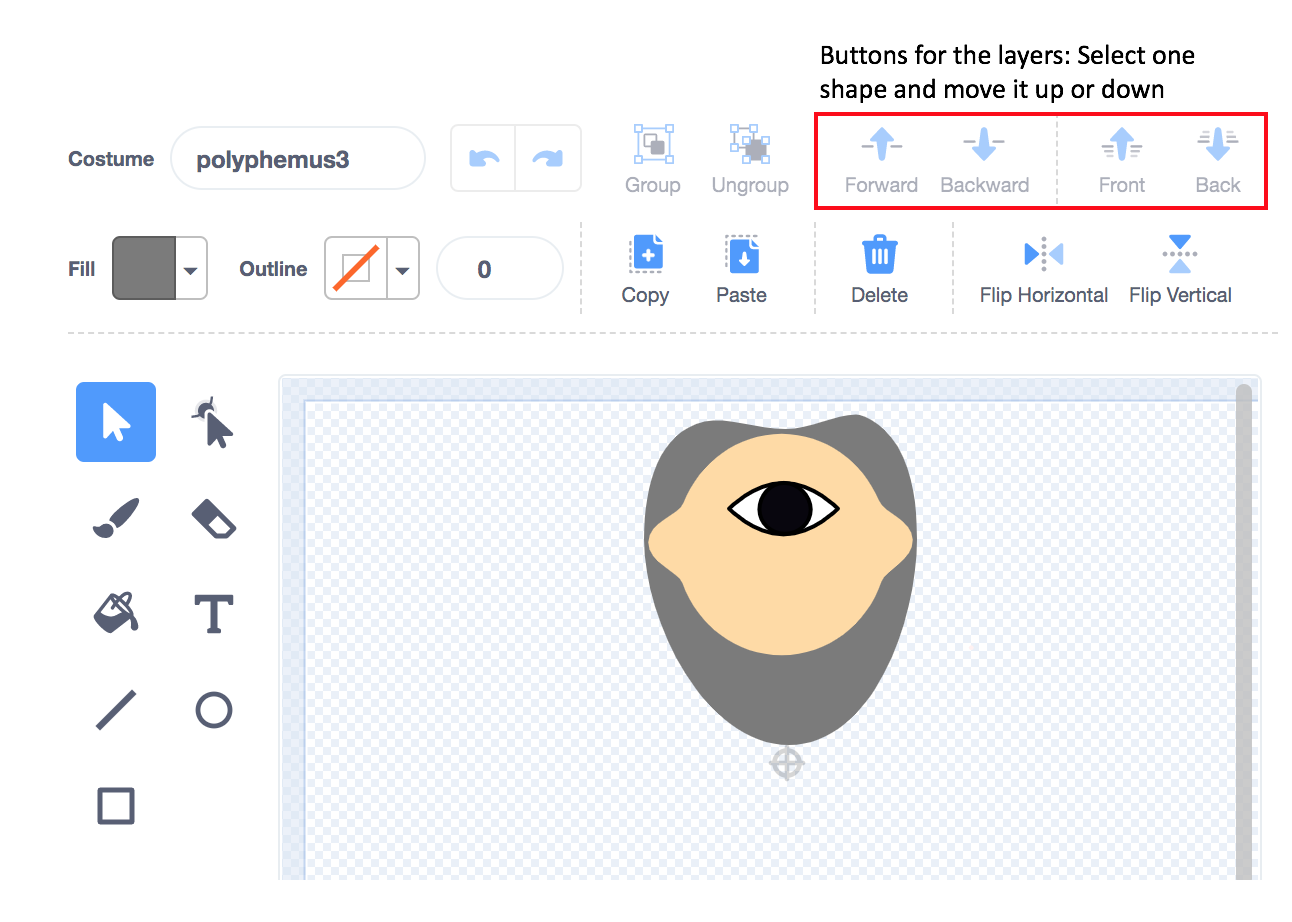 Once we have part of the head, we continue step by step with the rest of the character.
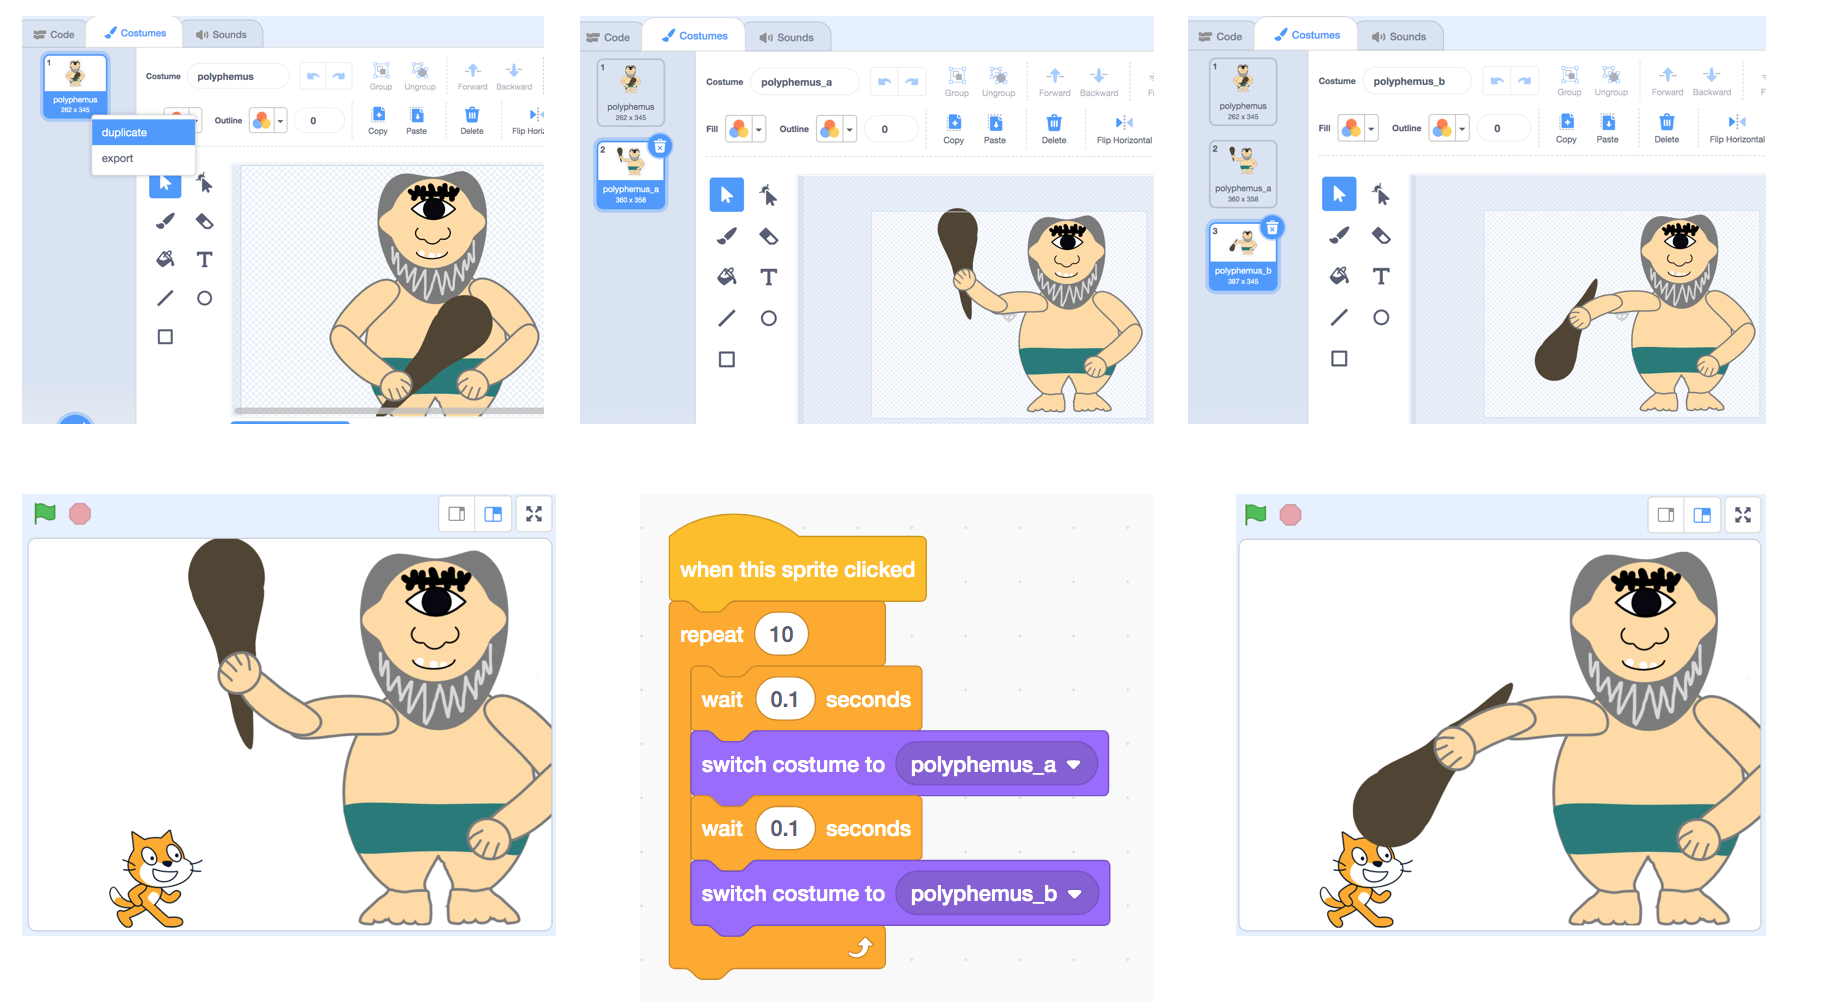
 We are now going to give life to a character, and to do so we are going to introduce the concept of “costume”. It’s easy to get on the finished drawing and with the right click, click on duplicate, and a new dress (a new drawing) appears identical to the previous one. From here we can modify the duplicated drawing. In our project we easily created two new costumes for Polyphemus. Now in the code part we can easily change the costume to the sprite to make it look alive.
 Polyphemus
From own art (drawing, maker project, etc.)
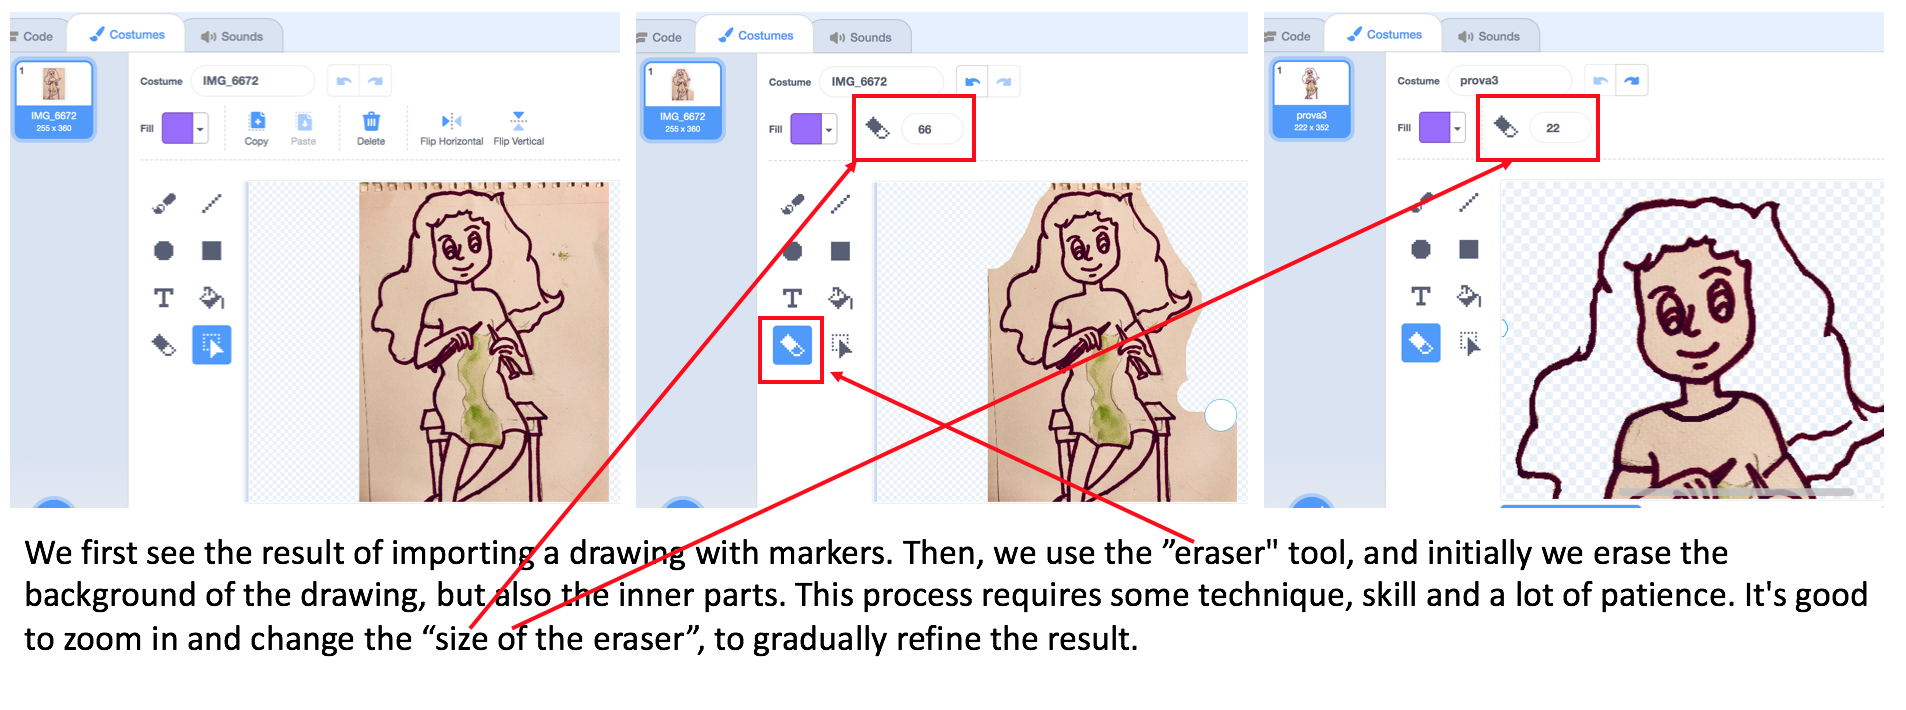
What we are going to tell in this section we like very much, and it is the method we recommend to create characters, because it is pedagogically powerful, and we understand that it can be a very enriching experience, to mix medias to create sprites and scenarios. In this section we are going to tell you how to incorporate characters that we have created on paper, either with markers, brushes or with cardboards. Once the drawing is created, we must photograph it, and then with the option “Upload Sprite” incorporate it as a new sprite in the Scratch project. Let’s look at an example.
Let’s see another example with Ulysses:
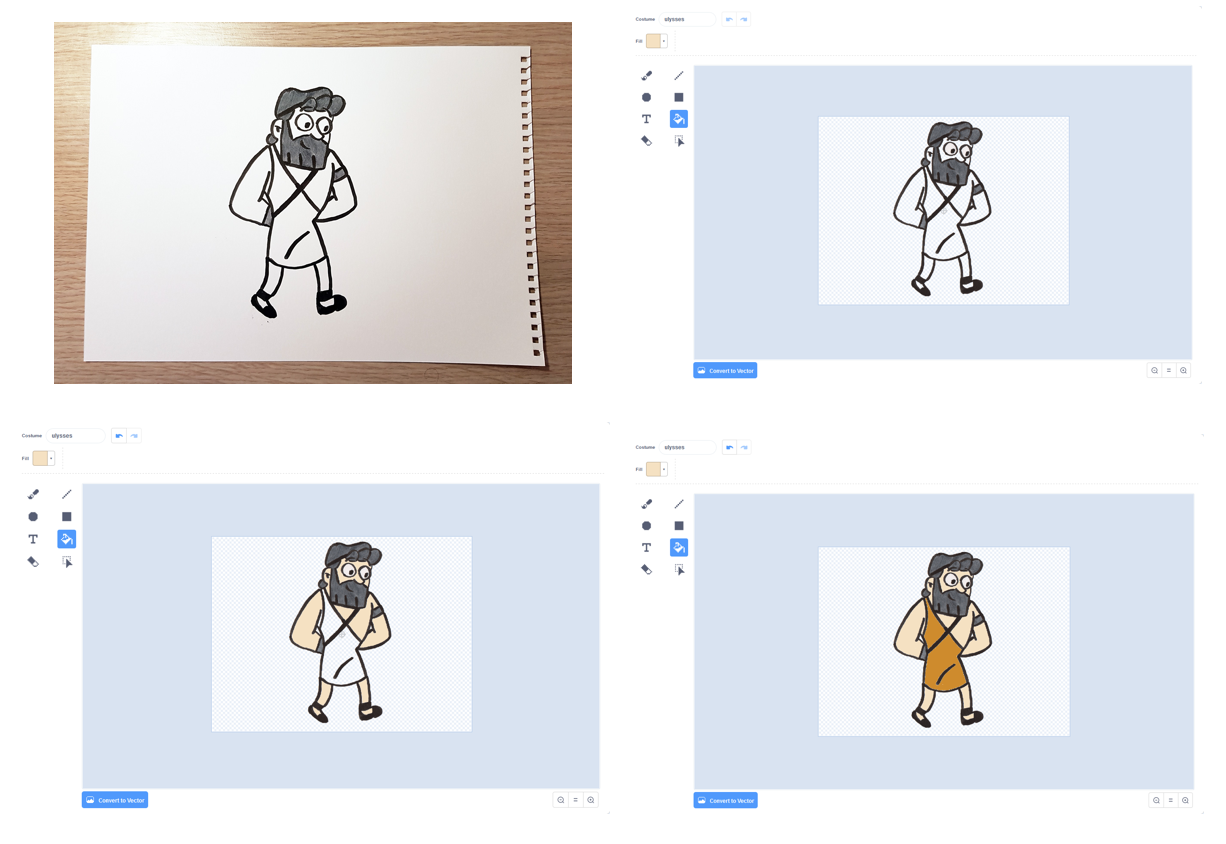
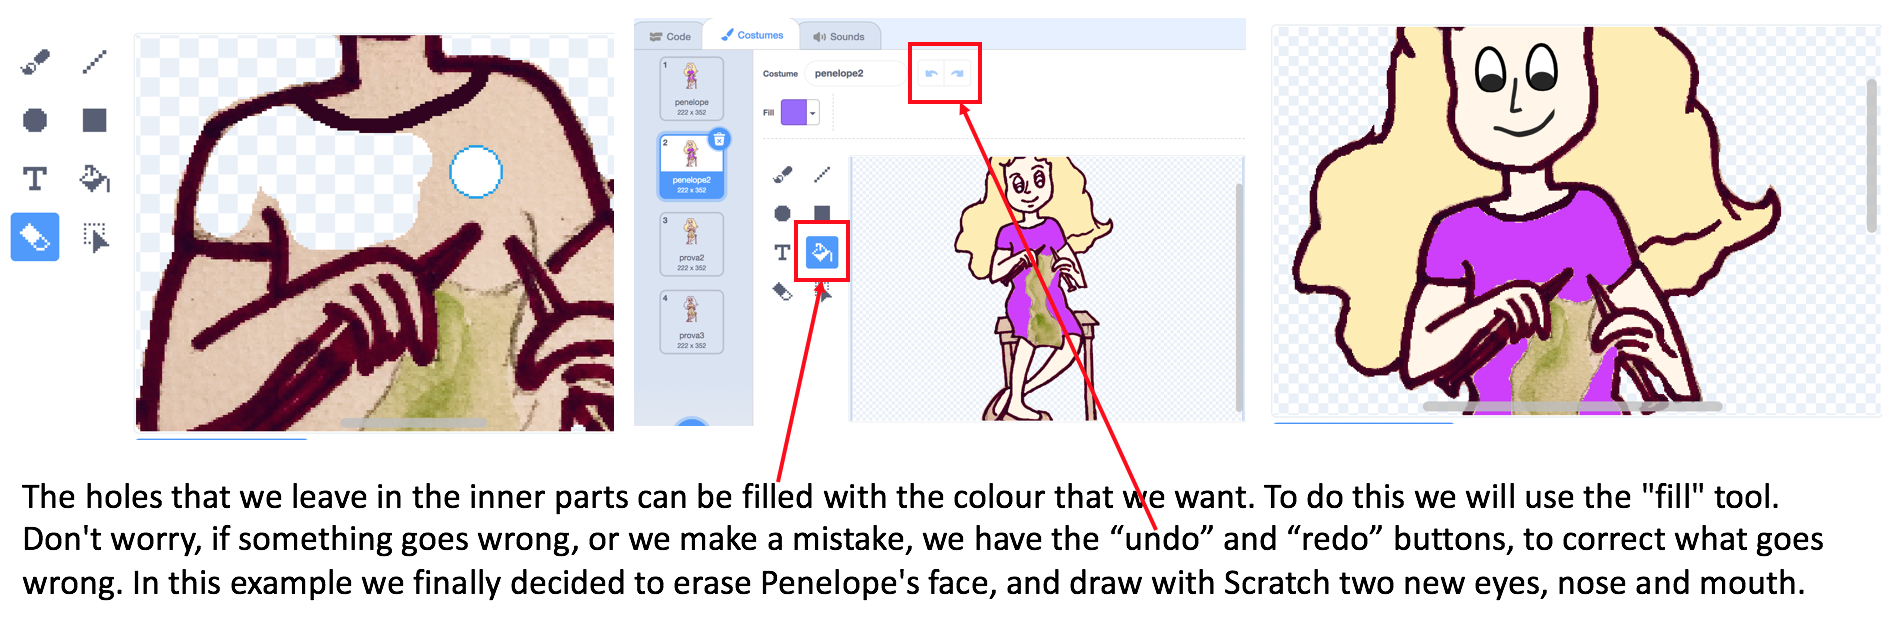
We create the drawing on paper and markers, upload the image to the Scratch, erase the background and interior parts, and colour with the fill tool.
We can also create different costumes for these characters. One way is by using two pictures of the same character: that is by making two drawings with some variation between them. Another way is to digitally manipulate the original drawing. That is to say: cut, paste, draw, select & move, change the mouth, move the arm, cross the legs, etc. Let the students discover, invent and try out different costumes.
The procedure for drawing scenarios is identical to that of the characters. We can select a background from a gallery, create one ourselves with the Scratch graphic editor, or import the photograph we want as a background. In the following image the background created with brushes that shows a sea and a moon at dusk. The only thing we have done is to expand the image: with the selection tool, we select a region and then expand it to cover the whole scenario.
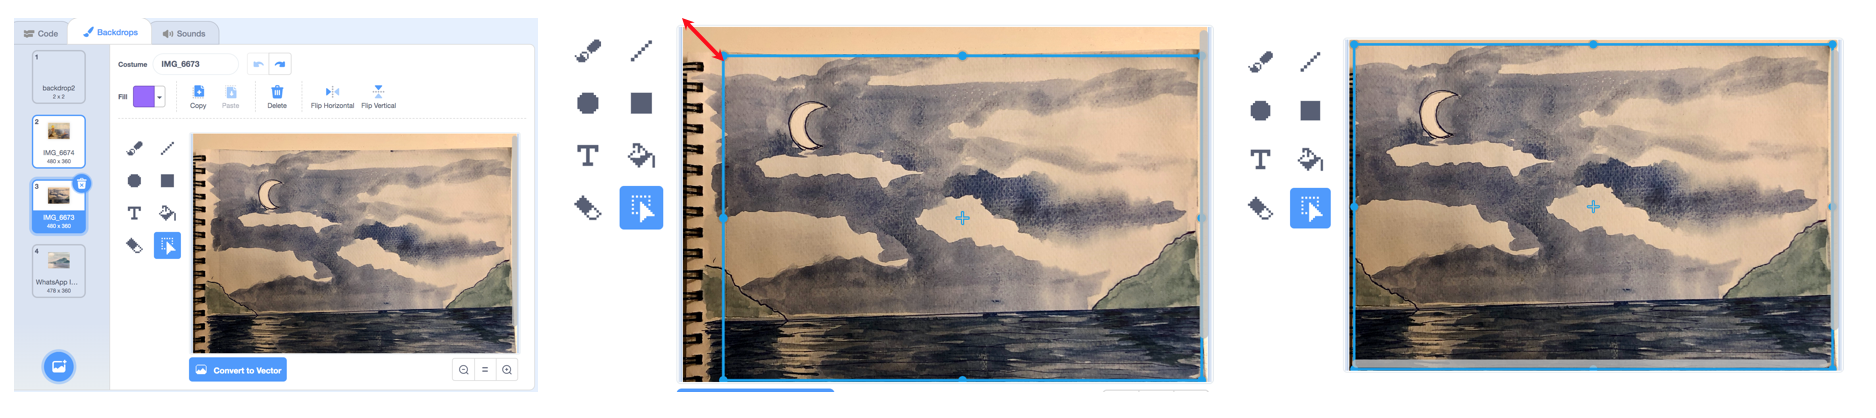 As we see in the first image, our project can have different backgrounds, and we will see later how to change from one scenario to another.