The activity of creating a collaborative story with Scratch can be approached in many possible ways. The following are three of the most common.
Each team makes its own story
A first possibility is to divide the class into teams and propose each team to create its own story. If we approach it this way, collaboration is only within the team, not between teams.
The benefit is that in the end we will have many different stories, the main drawback is that there is no co-creation between teams.
Pairing teams
In this other approach, the class is also divided into teams, and each team is paired with another. A story is decided among all, and each pair of teams splits the story half and half.
In this way there is collaboration within the team, and co-creation between partner teams.
This way of working promotes the use of some very interesting options in Scratch, such as Sharing, Remixing, and using the Backpack (see section III.2.10.5).
With this approach, we can also pair up teams from different classes, or even from different schools and countries.
Each team in the class does one scene of the story
This last approach is also very interesting. The class is divided into teams and the story is decided together. Then the story is divided into parts (scenes), one for each team.
In this way there is collaboration within the team, and co-creation between teams.
As in the previous approach, this way of working promotes the use of Sharing, Remixing, and using the Backpack.
To visualize the entire story, there are different options. One of the most fun and spectacular is to align the computers of all the teams, synchronize the scenes (so that each one starts when the other one finishes) and enjoy the show with the whole class.
If they have co-created backgrounds that continue from one screen to another, and the characters are well synchronized, you can get the effect that the characters jump from one computer to another.
Interesting Scratch features for collaboration: Share, Remix and Backpack
Below we will try to explain some of the ways that exist to share and work together in co-creating the same project with Scratch. One of the things we insist on is teamwork. But teamwork doesn’t mean one of the children has control of the keyboard and computer and the other two children “just look”. Teamwork means planning and organizing tasks, every one of the team working on one thing, having one child on the team help and review what the other has done (and vice versa), building slowly and iteratively, sharing, showing what has done to each other, reflect and improve the work together. For all this, it is important to have tools so that, for example, two girls work on the same project, they can co-create and co-work correctly. This can be done in several ways. For example, sharing the same username and password. The only thing we have to watch out for in this option is that from two computers they don’t work on the same project at the same time (if this happens, we only keep the work of the last one that presses the “save” button). We can also save the project on a pen drive, and copy it to the other computer, or send it by email, or…
The “backpack” method
Imagine we are two or three people working on the same project. In this case, Natalie and Mariona are from the same team and work together on the #Odyssey project. One of the tasks each one has to do is to draw a character. Below we tell you how Mariona can incorporate into her project, the character drawn by Natalie.
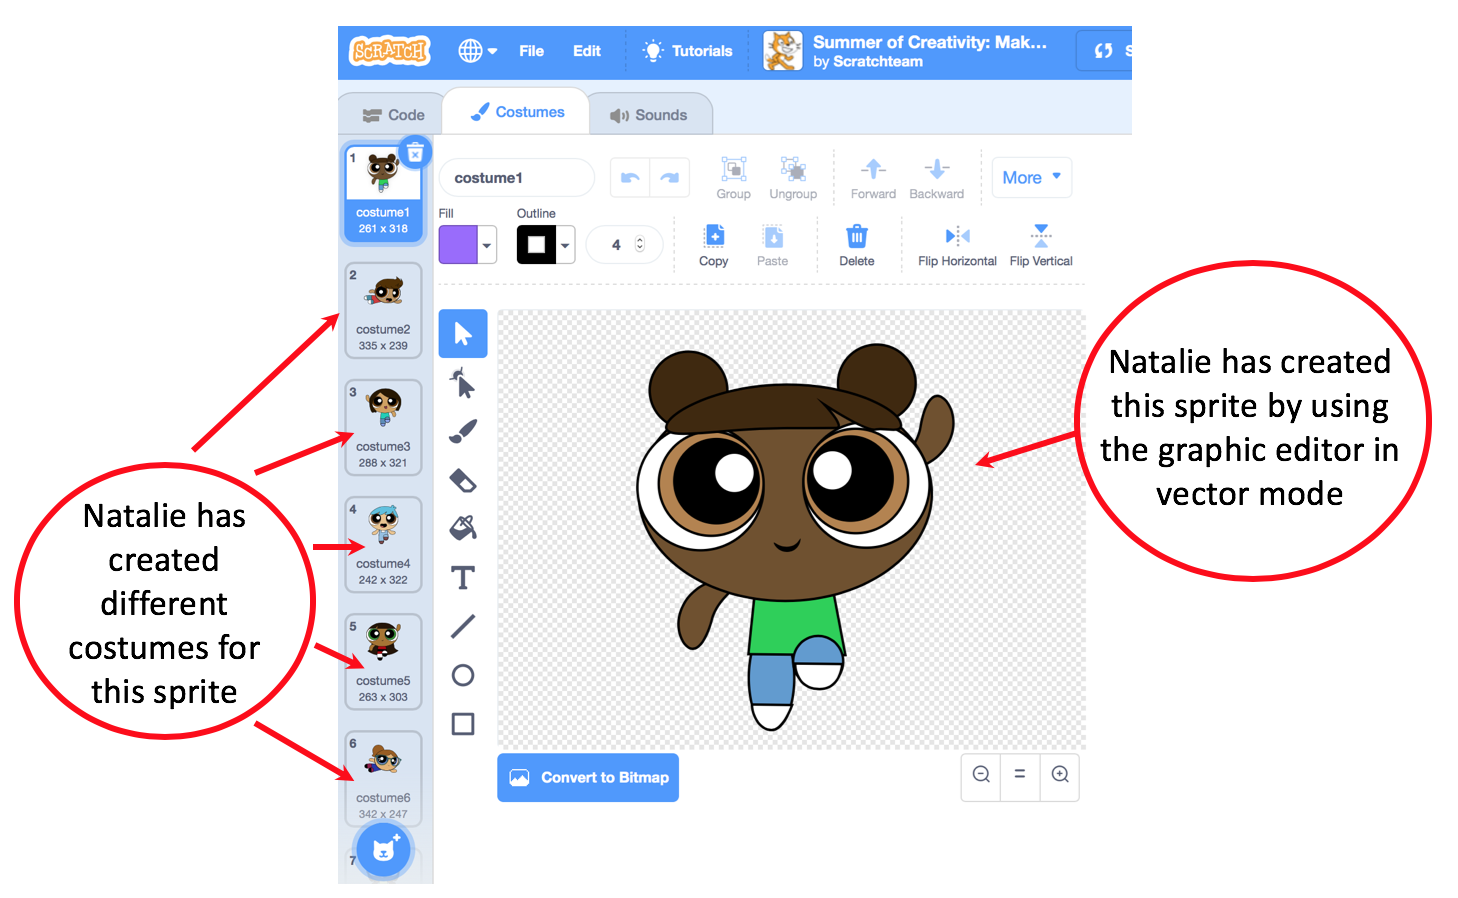
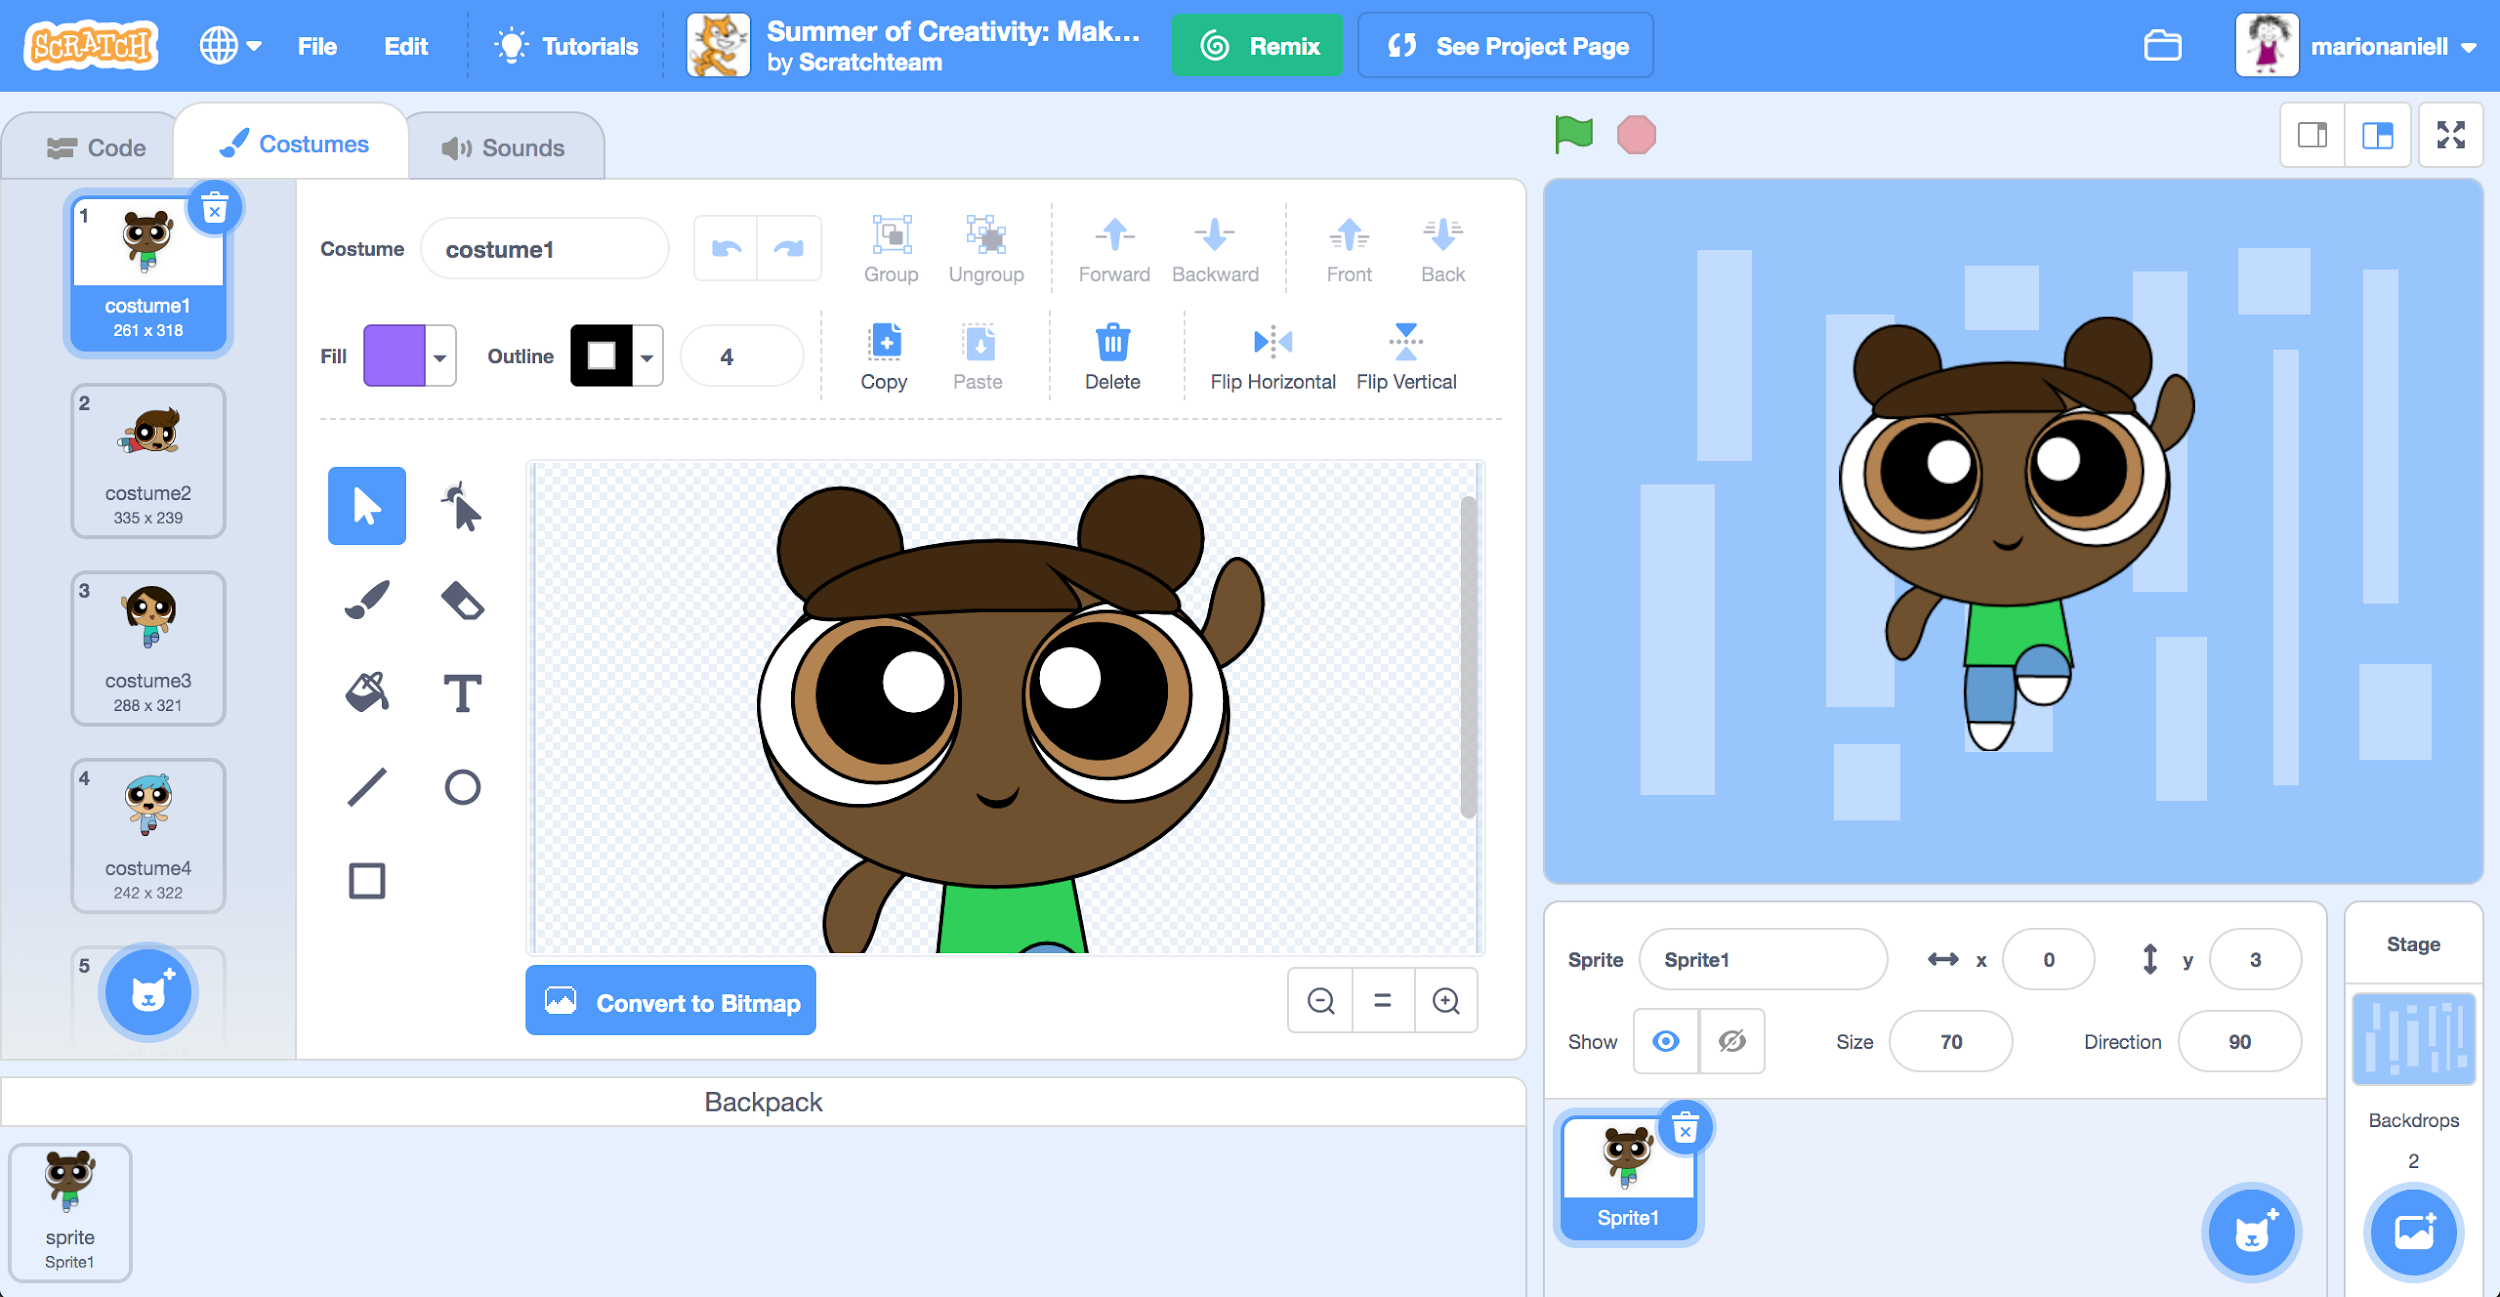
For example, imagine that NATALIE from her Scratch account (We use this account for this tutorial: @scratchteam) is working on a project creating a character who has different costumes[1].
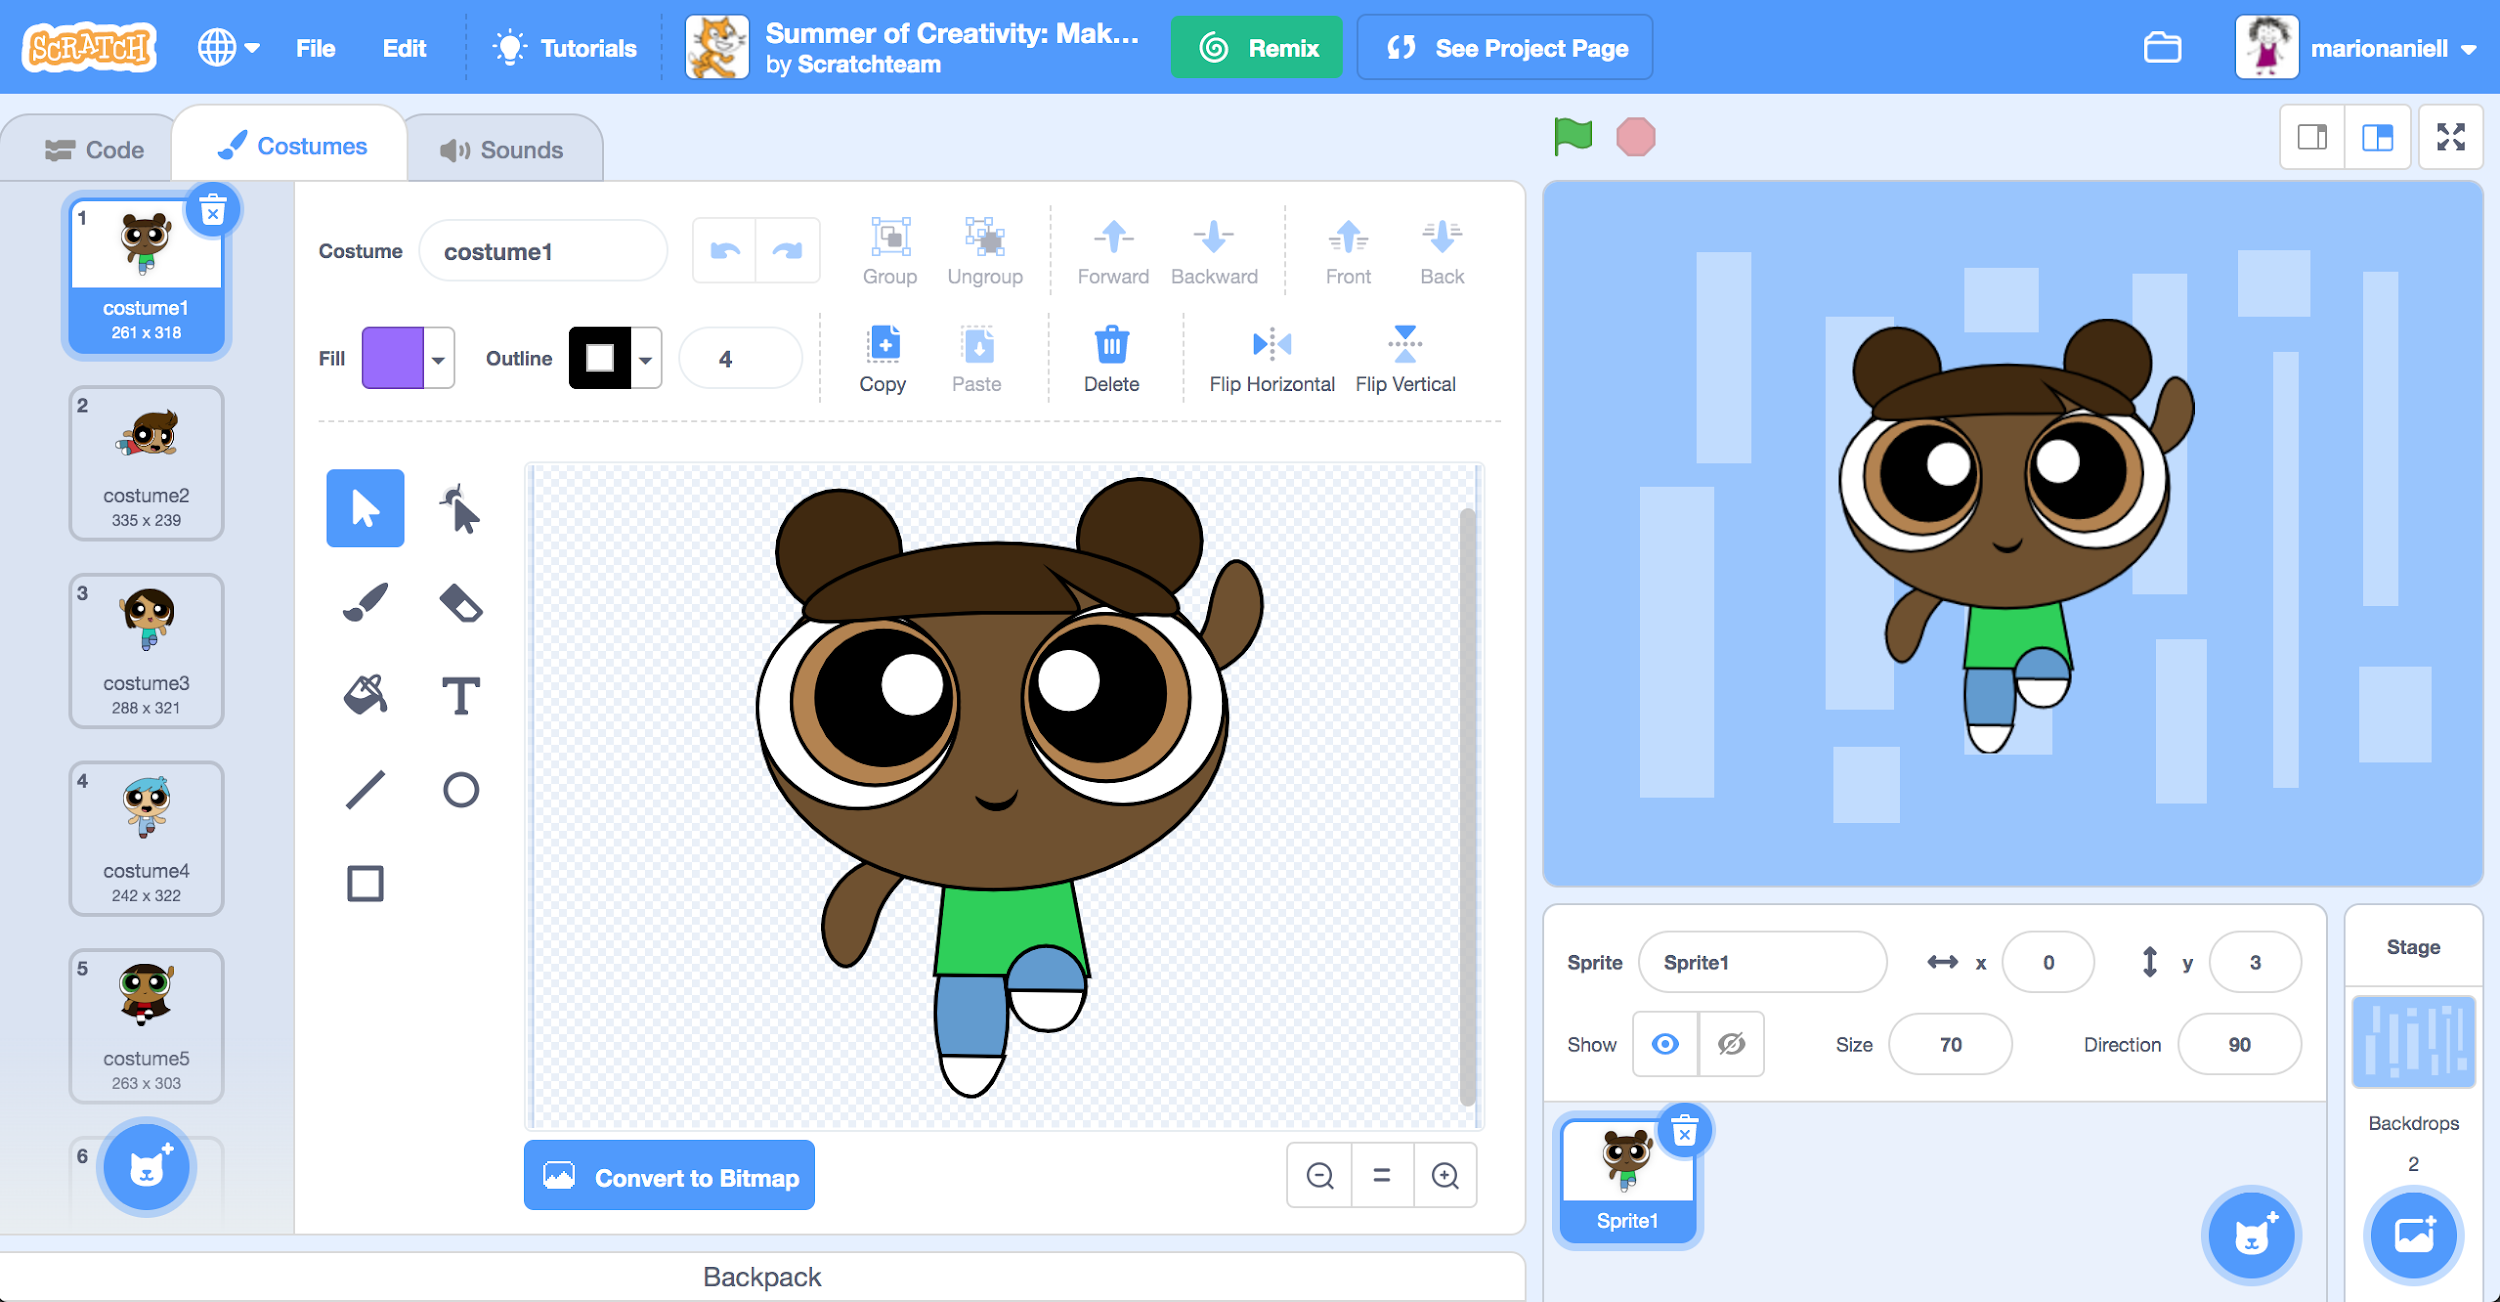
MARIONA from her Scratch account @marionaniell can visit the project of NATALIE and can “copy” whatever she likes for her projects (in fact, you can visit and copy any sprite from any project). To take it to her project MARIONA can use her backpack. What you can do is drag the sprite you like into your backpack (every user has each own backpack). But where is your backpack? The backpack appears when we hover the mouse at the bottom of the window and click on it.
ATTENTION: the backpack only appears when you enter Scratch with user and password. Scratch also allows you to create projects without having logged in, but then you do NOT have a backpack. The backpack is a utility that has every user and can be filled and emptied according to user needs. Here’s a graphic example: Where’s the backpack of the user who signed in as @marionaniell?
If you look at the bottom of the window you see the backpack:
And if we click on the backpack, this happens:
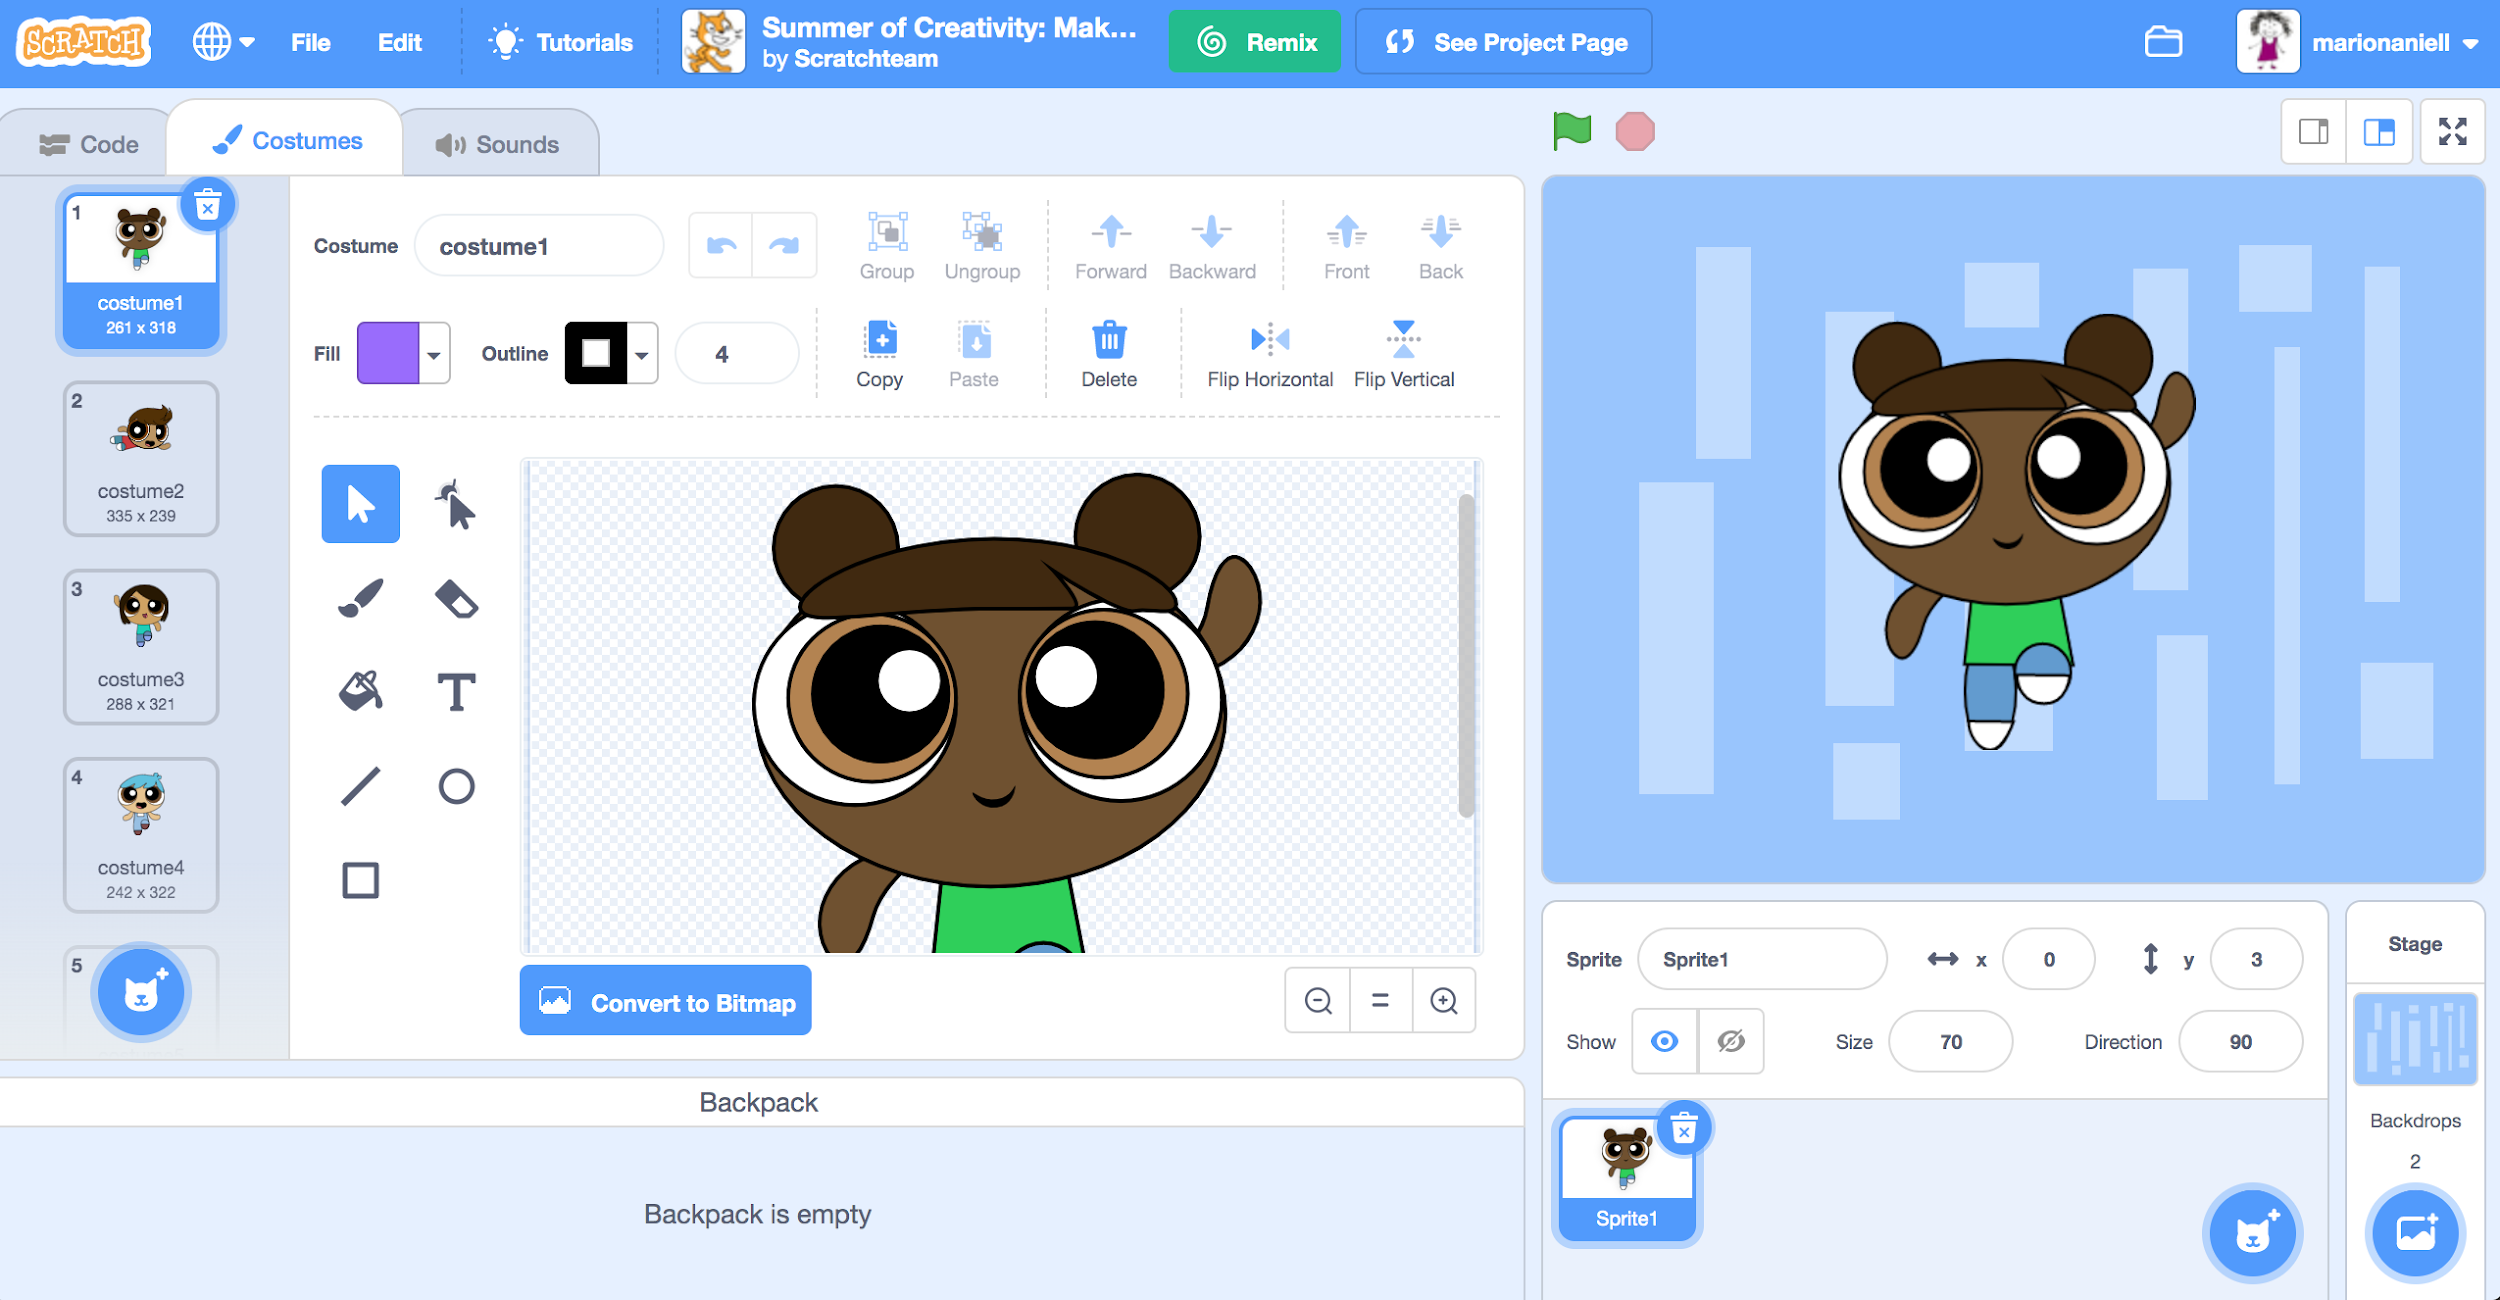
The backpack appears and tells us it is empty. Now what we can do is drag the character we are interested in into our backpack. Here’s what Mariona does:
And this is the result:
Now MARIONA is going to her project. She clicks on @marionaniell (upper right side)

and then, click on “My Stuff” and appears:
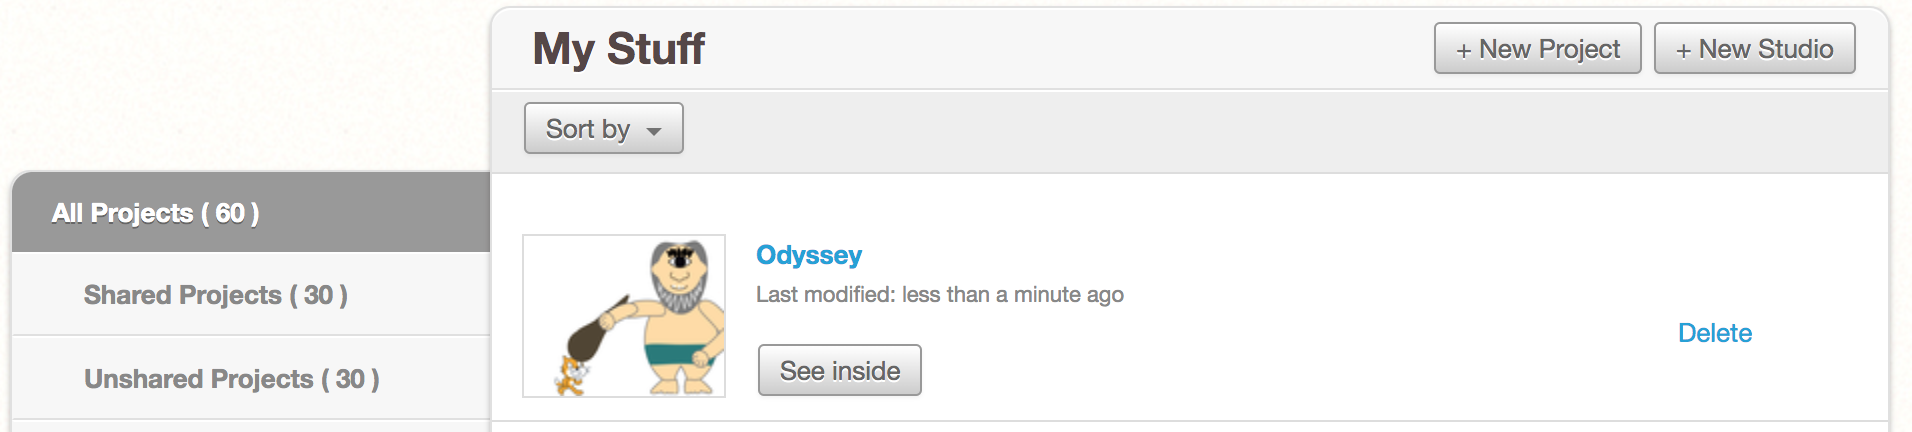
Click on “See inside” to work in the project about #Odyssey
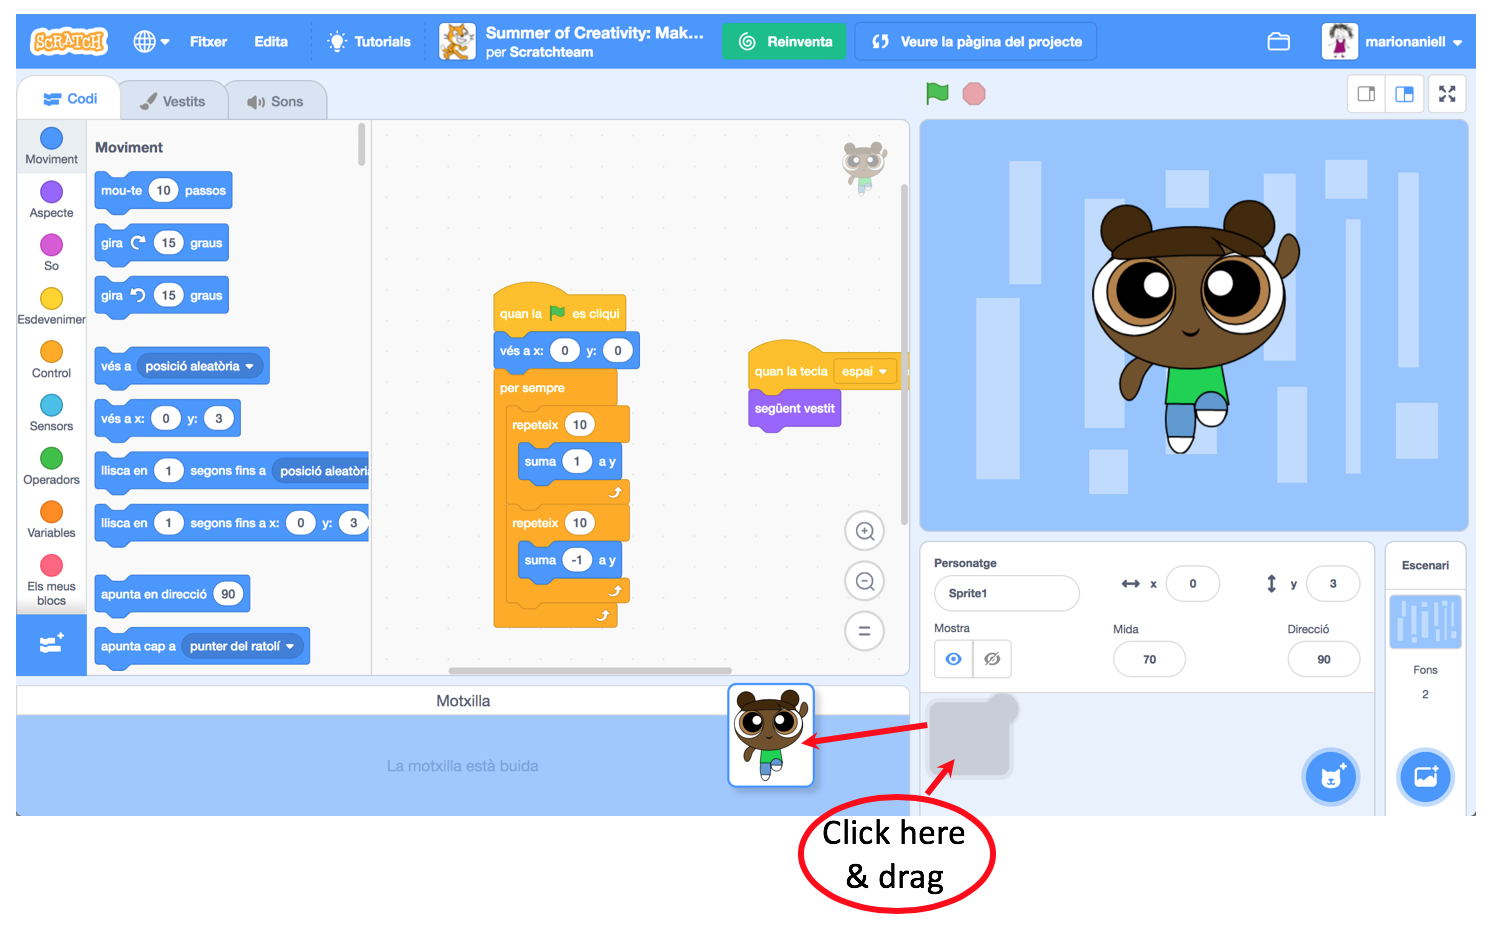
If we now, click on the backpack (at the bottom of the window where it says “Backpack”):
Appears what is inside my backpack, and I can drag it to the part of my sprites:
I let it go and I already have it incorporated in my project:
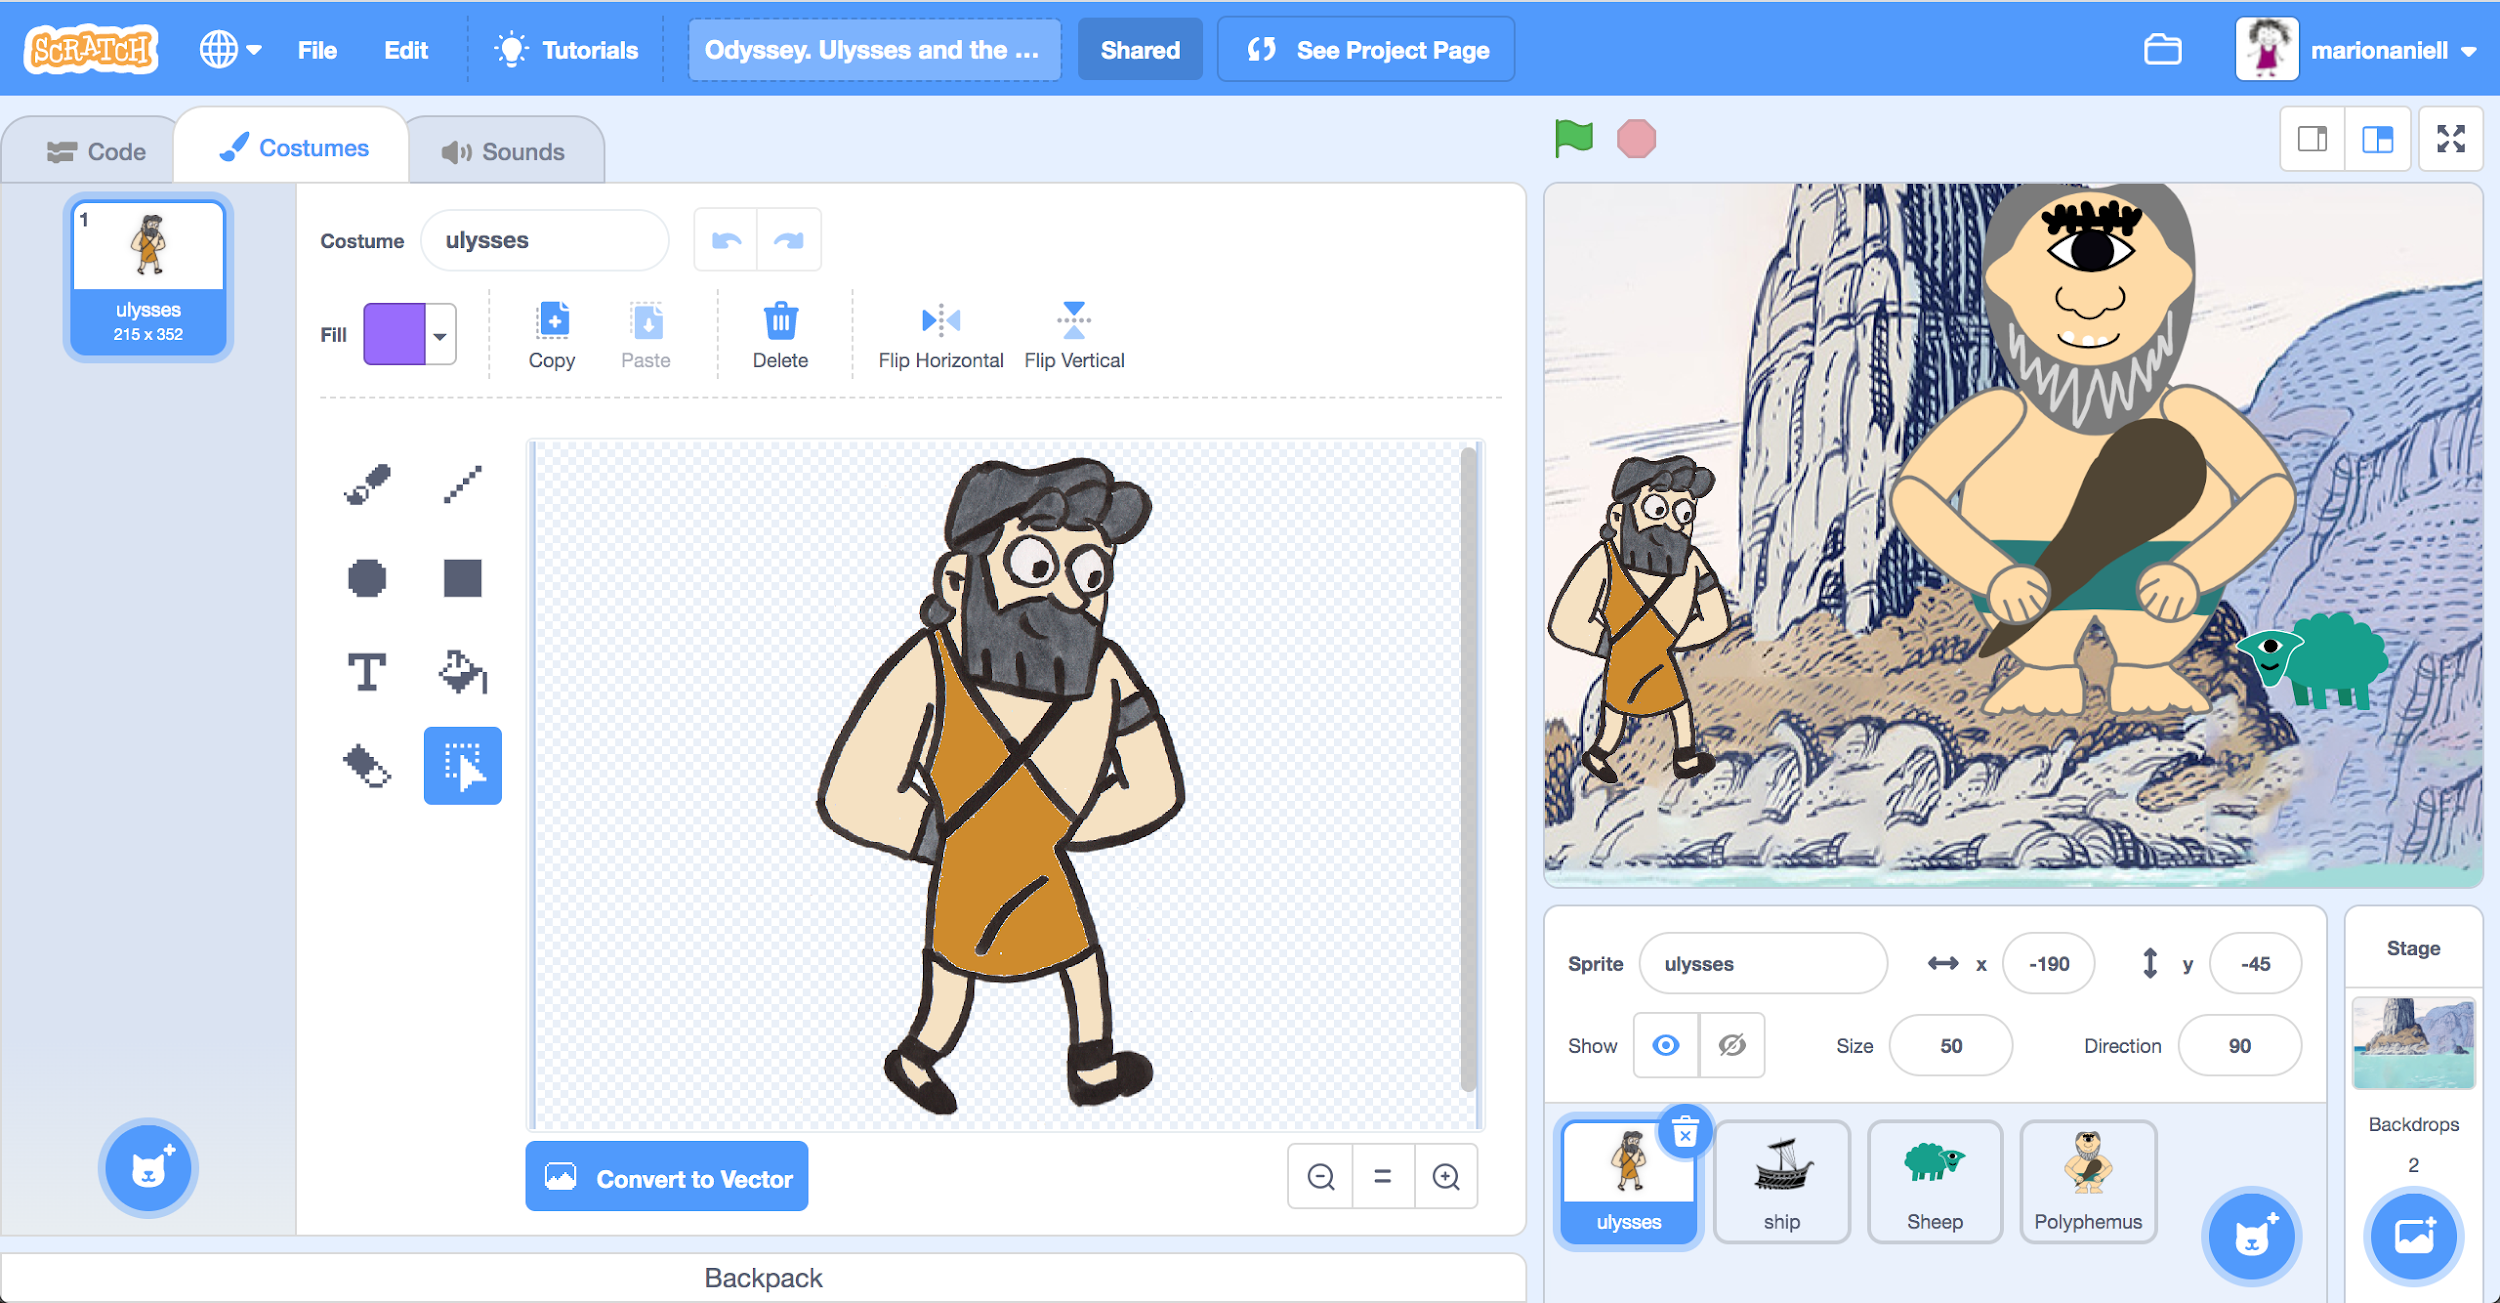
And if I click on the “Costumes” tab I can see all the costumes that NATALIE has created. If I click on “Code” I can see the code NATALIE has created for this sprite. I know this sprite can appear and disappear from our story whenever we want (see the pieces “show” and “hide” in the “Code” tab and the purple menu “Looks”).
Remix
In the following, we will describe how two teams (each with its own Scratch profile) can co-create a digital story, working in shifts (iterations), and through the process of remixing projects and sharing them in a studio.
To unfold the example, let’s imagine that there are two teams paired, coming from two different classes (Eduard is from class A and Mariona is from class B). Team A is working with the Scratch account of @eduardm, while team B is working with @marionaniell.
Let’s also imagine that the two teams have already agreed on the plot of the story and that the tasks have already been distributed. The team A designs the Ulysses character and the scenarios related with the island, while team B designs Polyphemus and the sheep, and then they take turns programming the story. At the first iteration, team A creates a scene where Ulysses arrives by boat on an unknown island, disembarks and finds the Cyclops Polyphemus. Team A has created the project and also shared it by clicking on the “share” button.
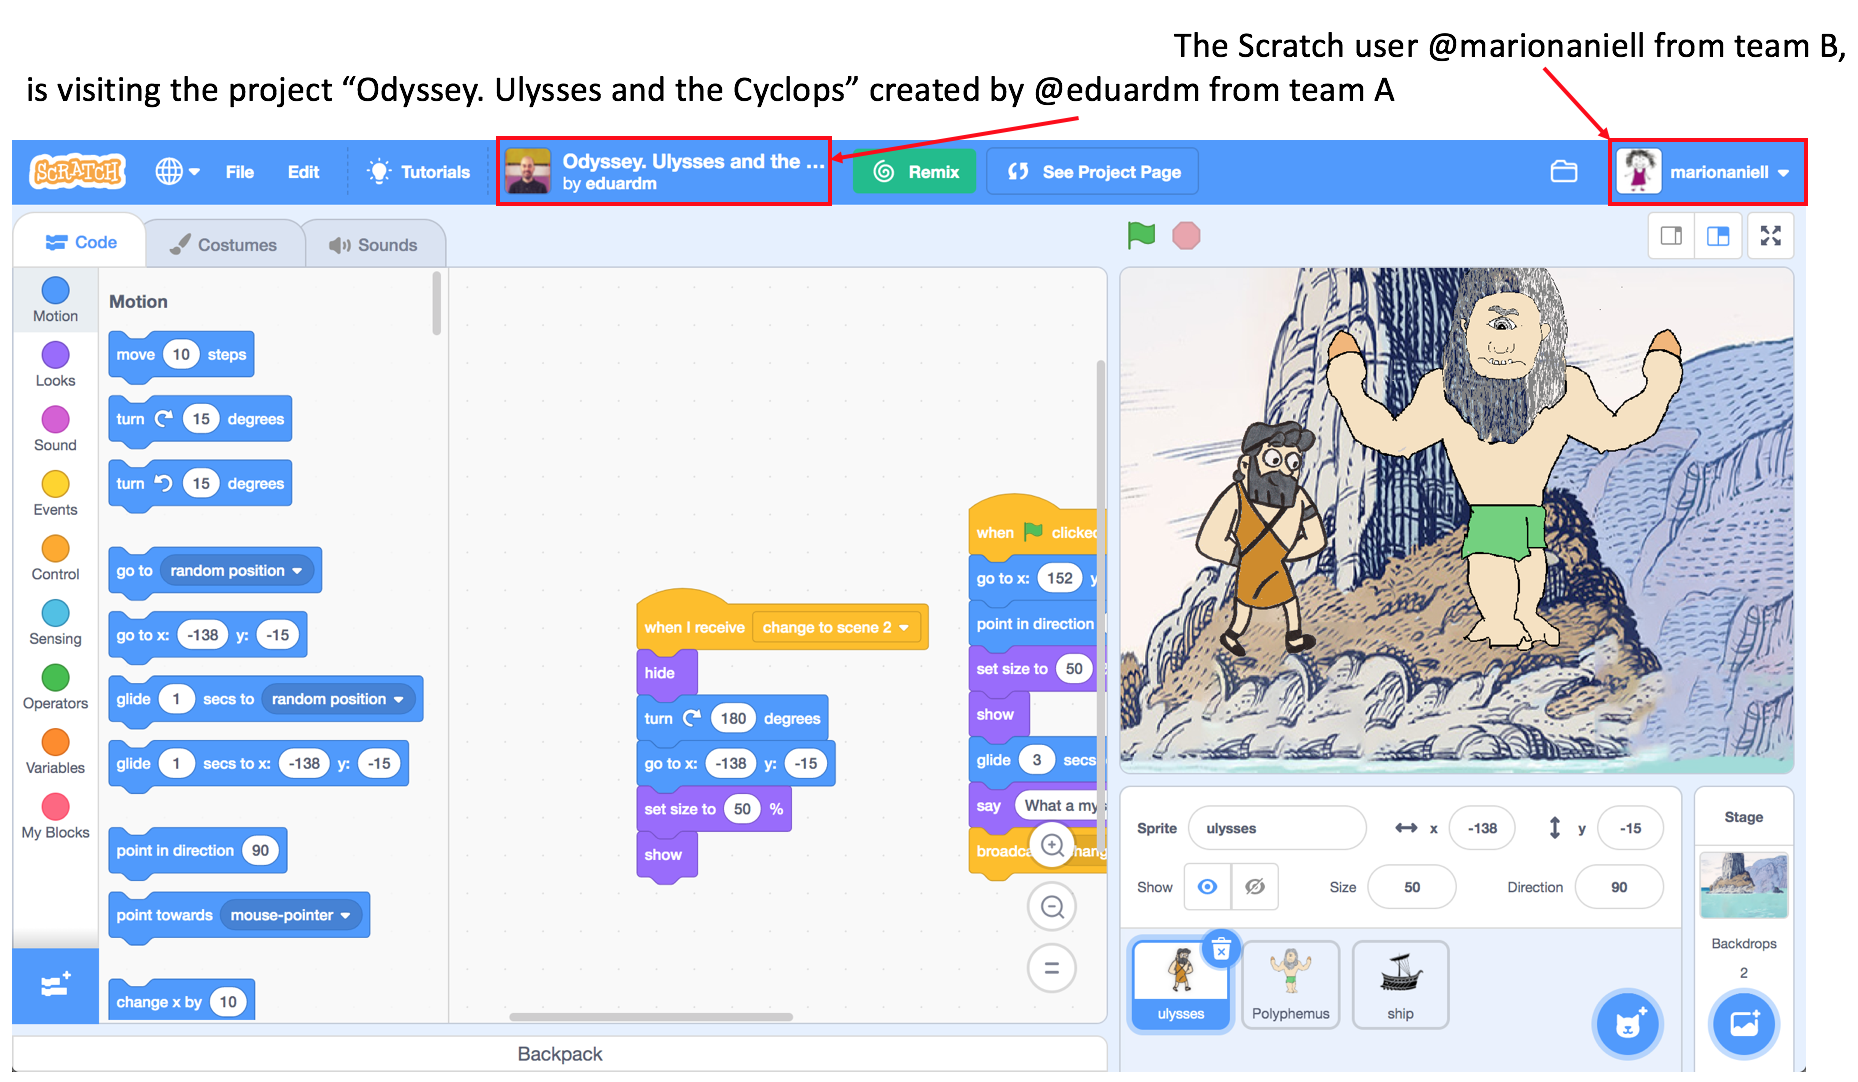
Let’s imagine this is the starting point, and now we’ll see step by step how Team B continues the story. Team B can visit the project created by team A:
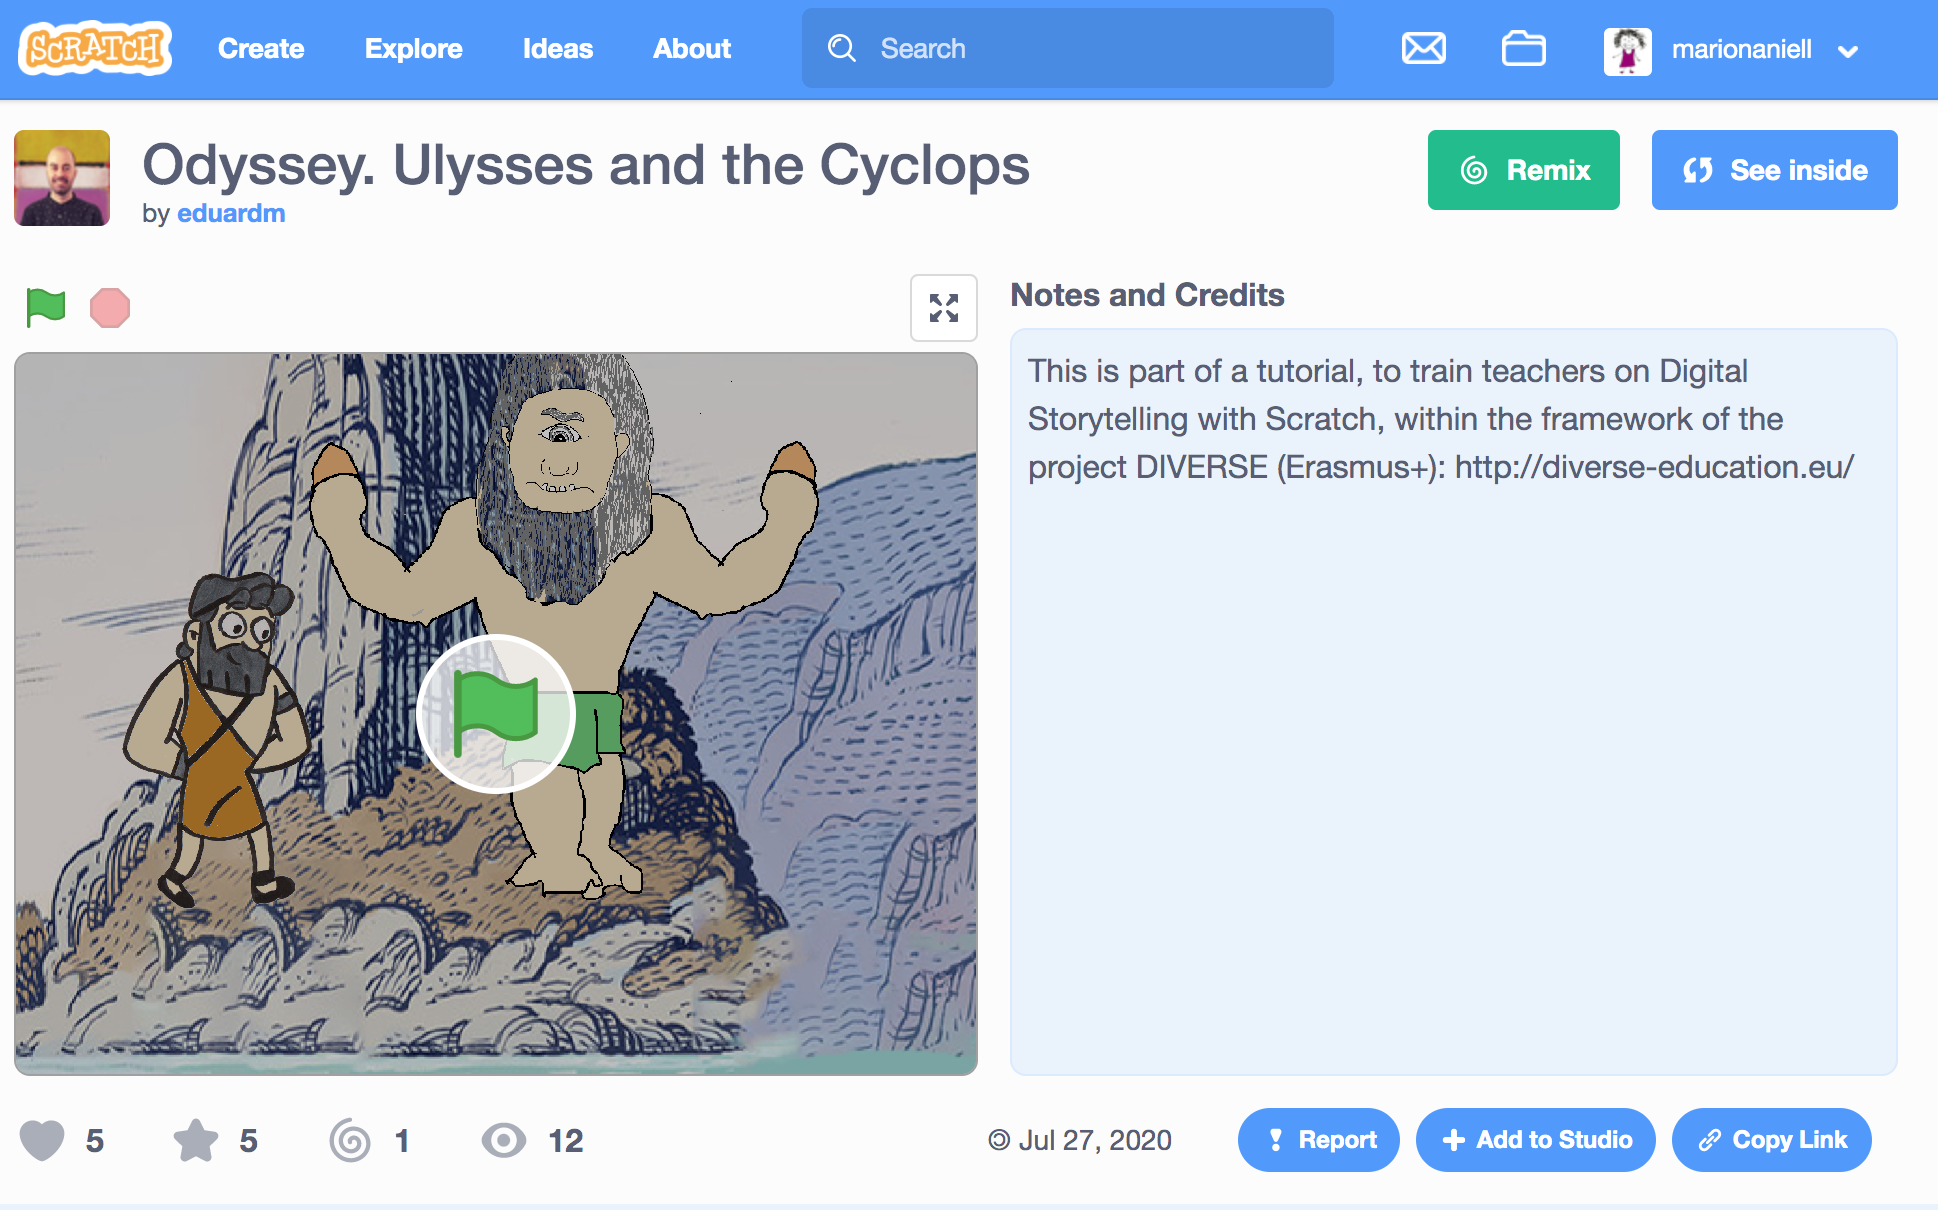
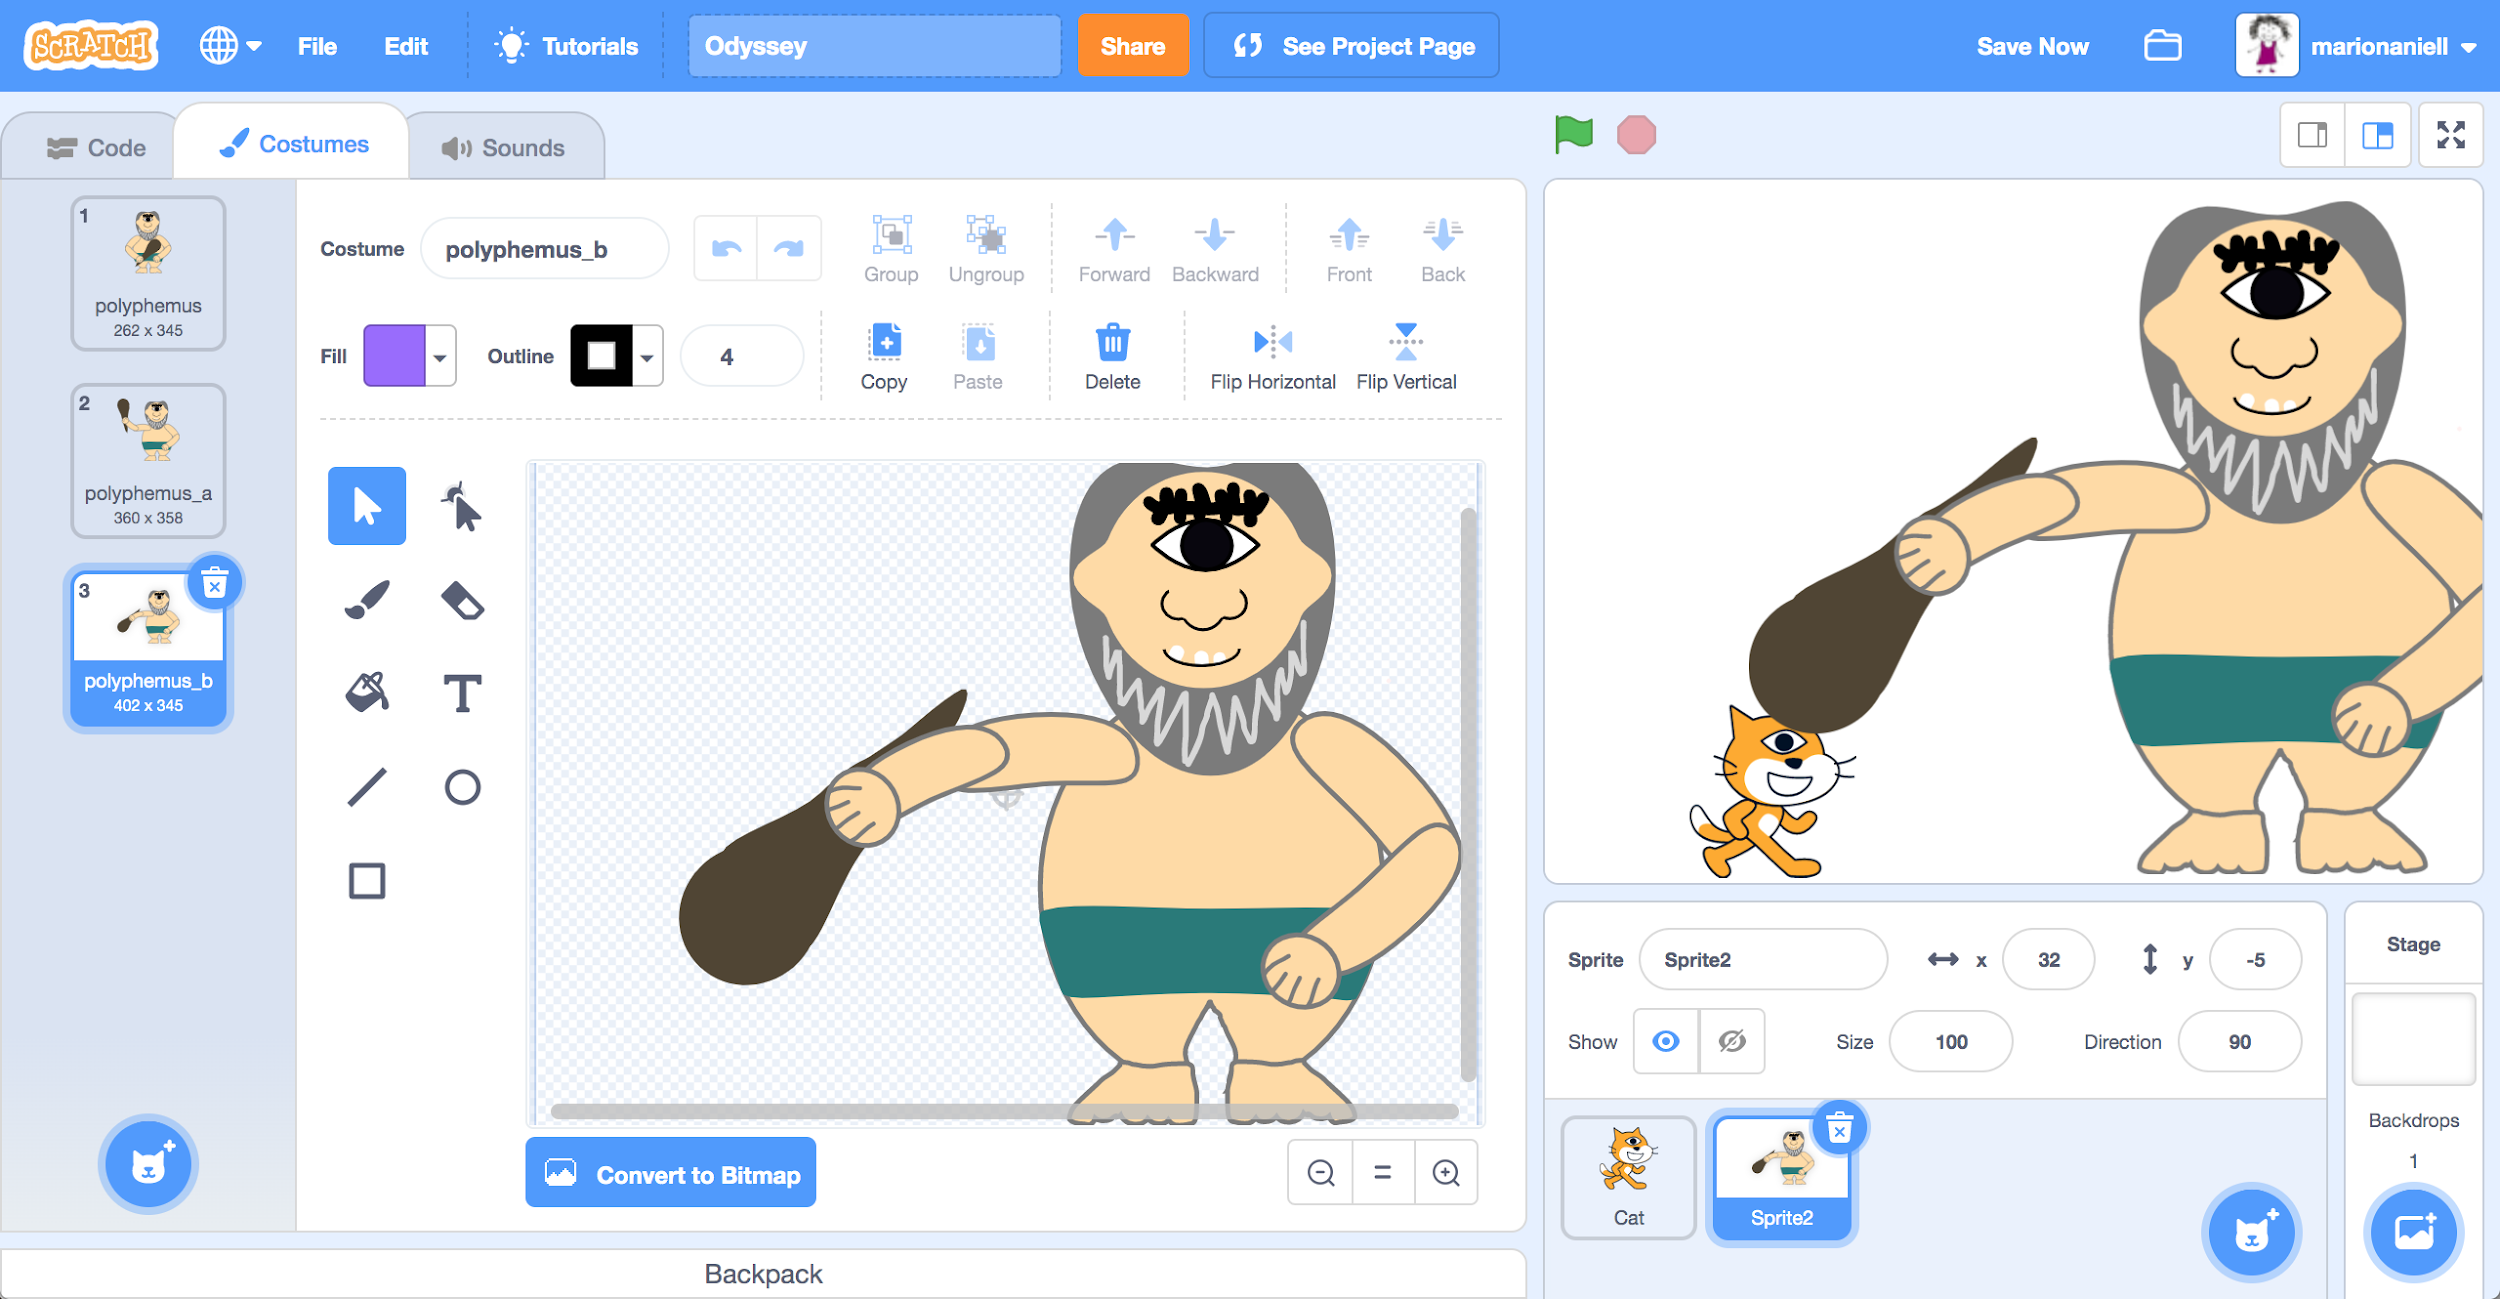
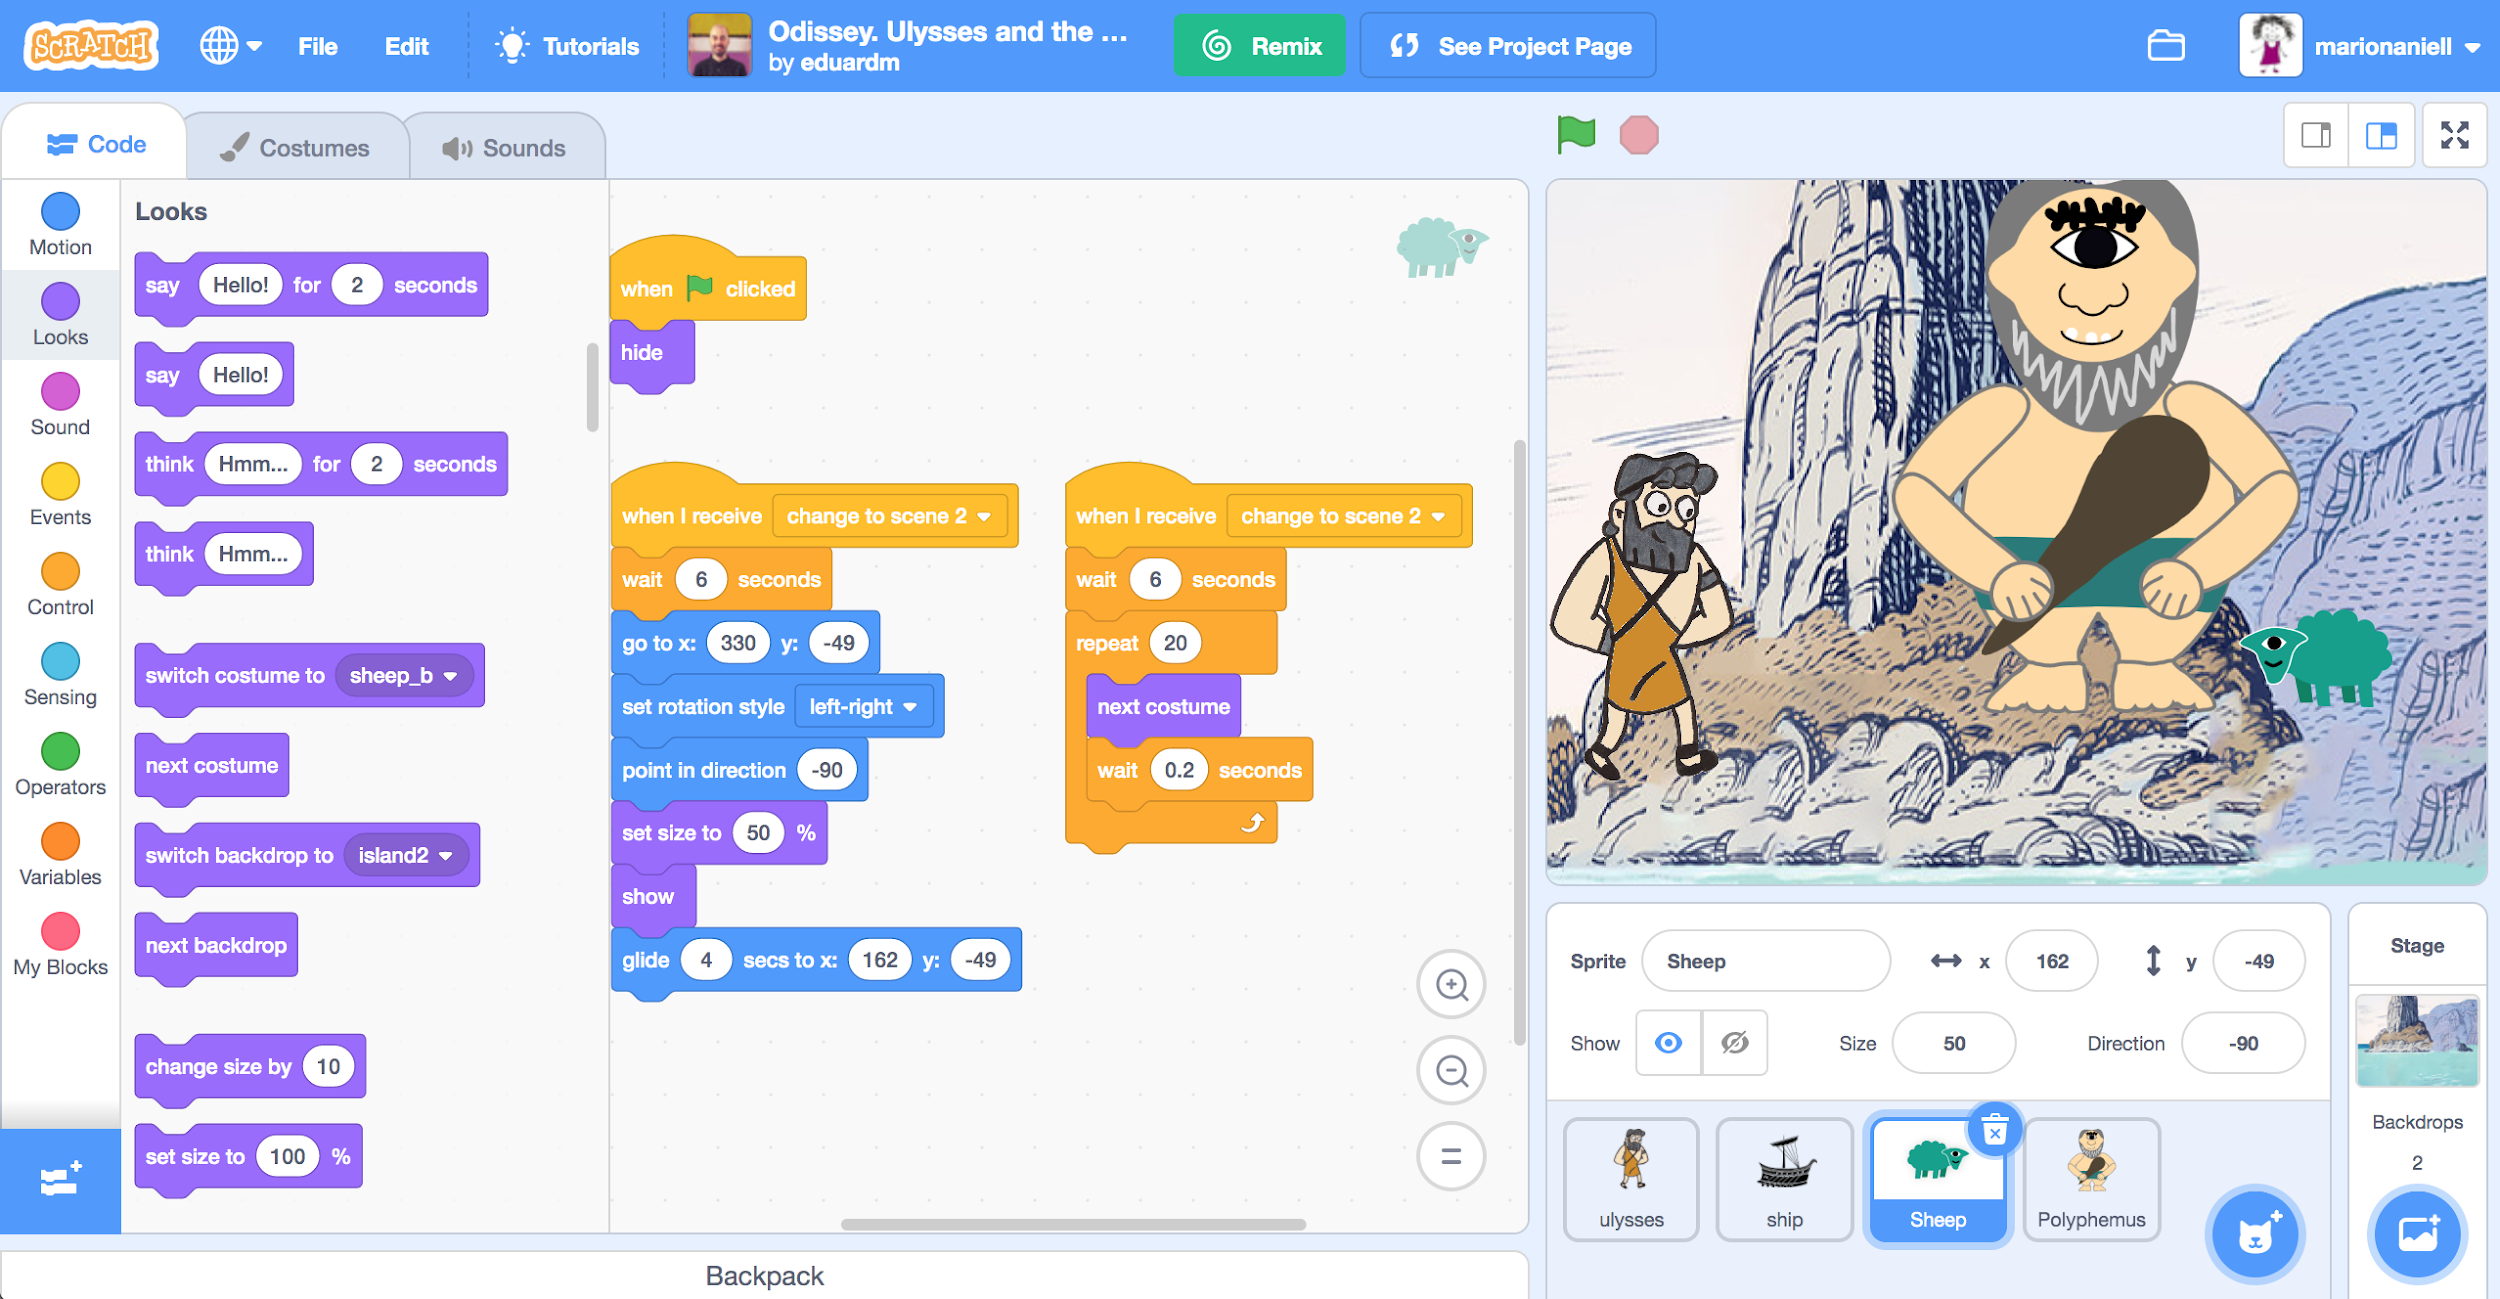
Then, click on “See Inside” button and see the following:
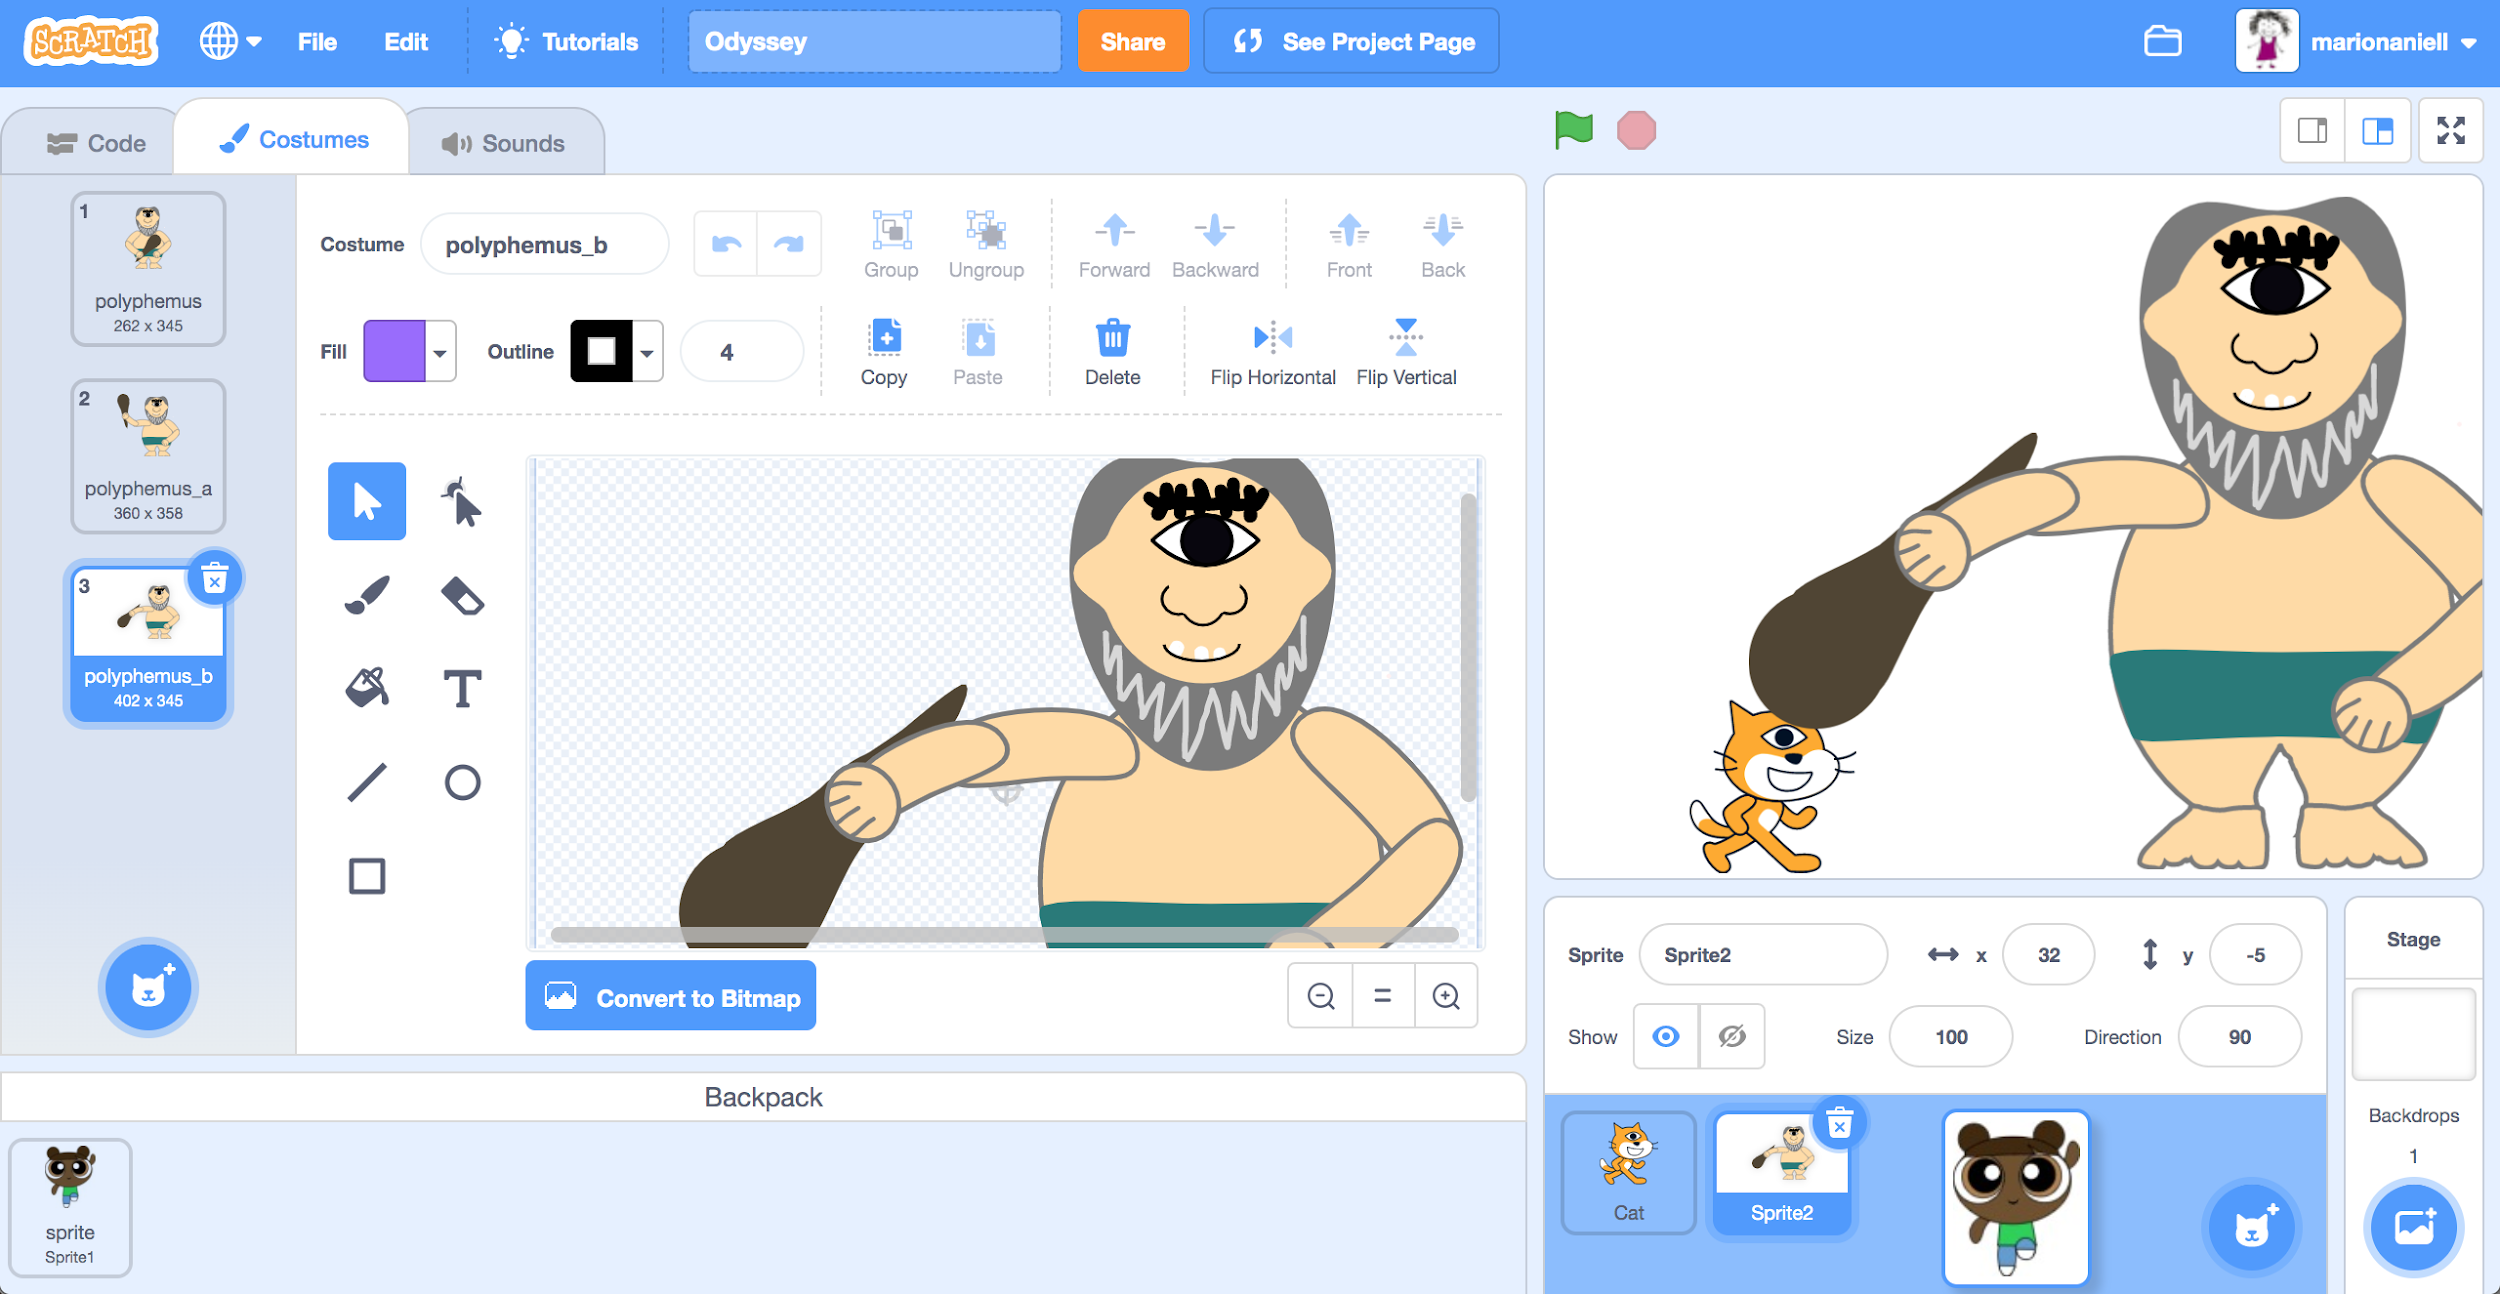
Note, although the team A was not assigned the task of drawing Polyphemus, they have done so. But, when team B takes the control, decides to erase the Polyphemus created by team A, and put into the scene a new Polyphemus they created. They can create a Polyphemus (or even take it from the backpack).
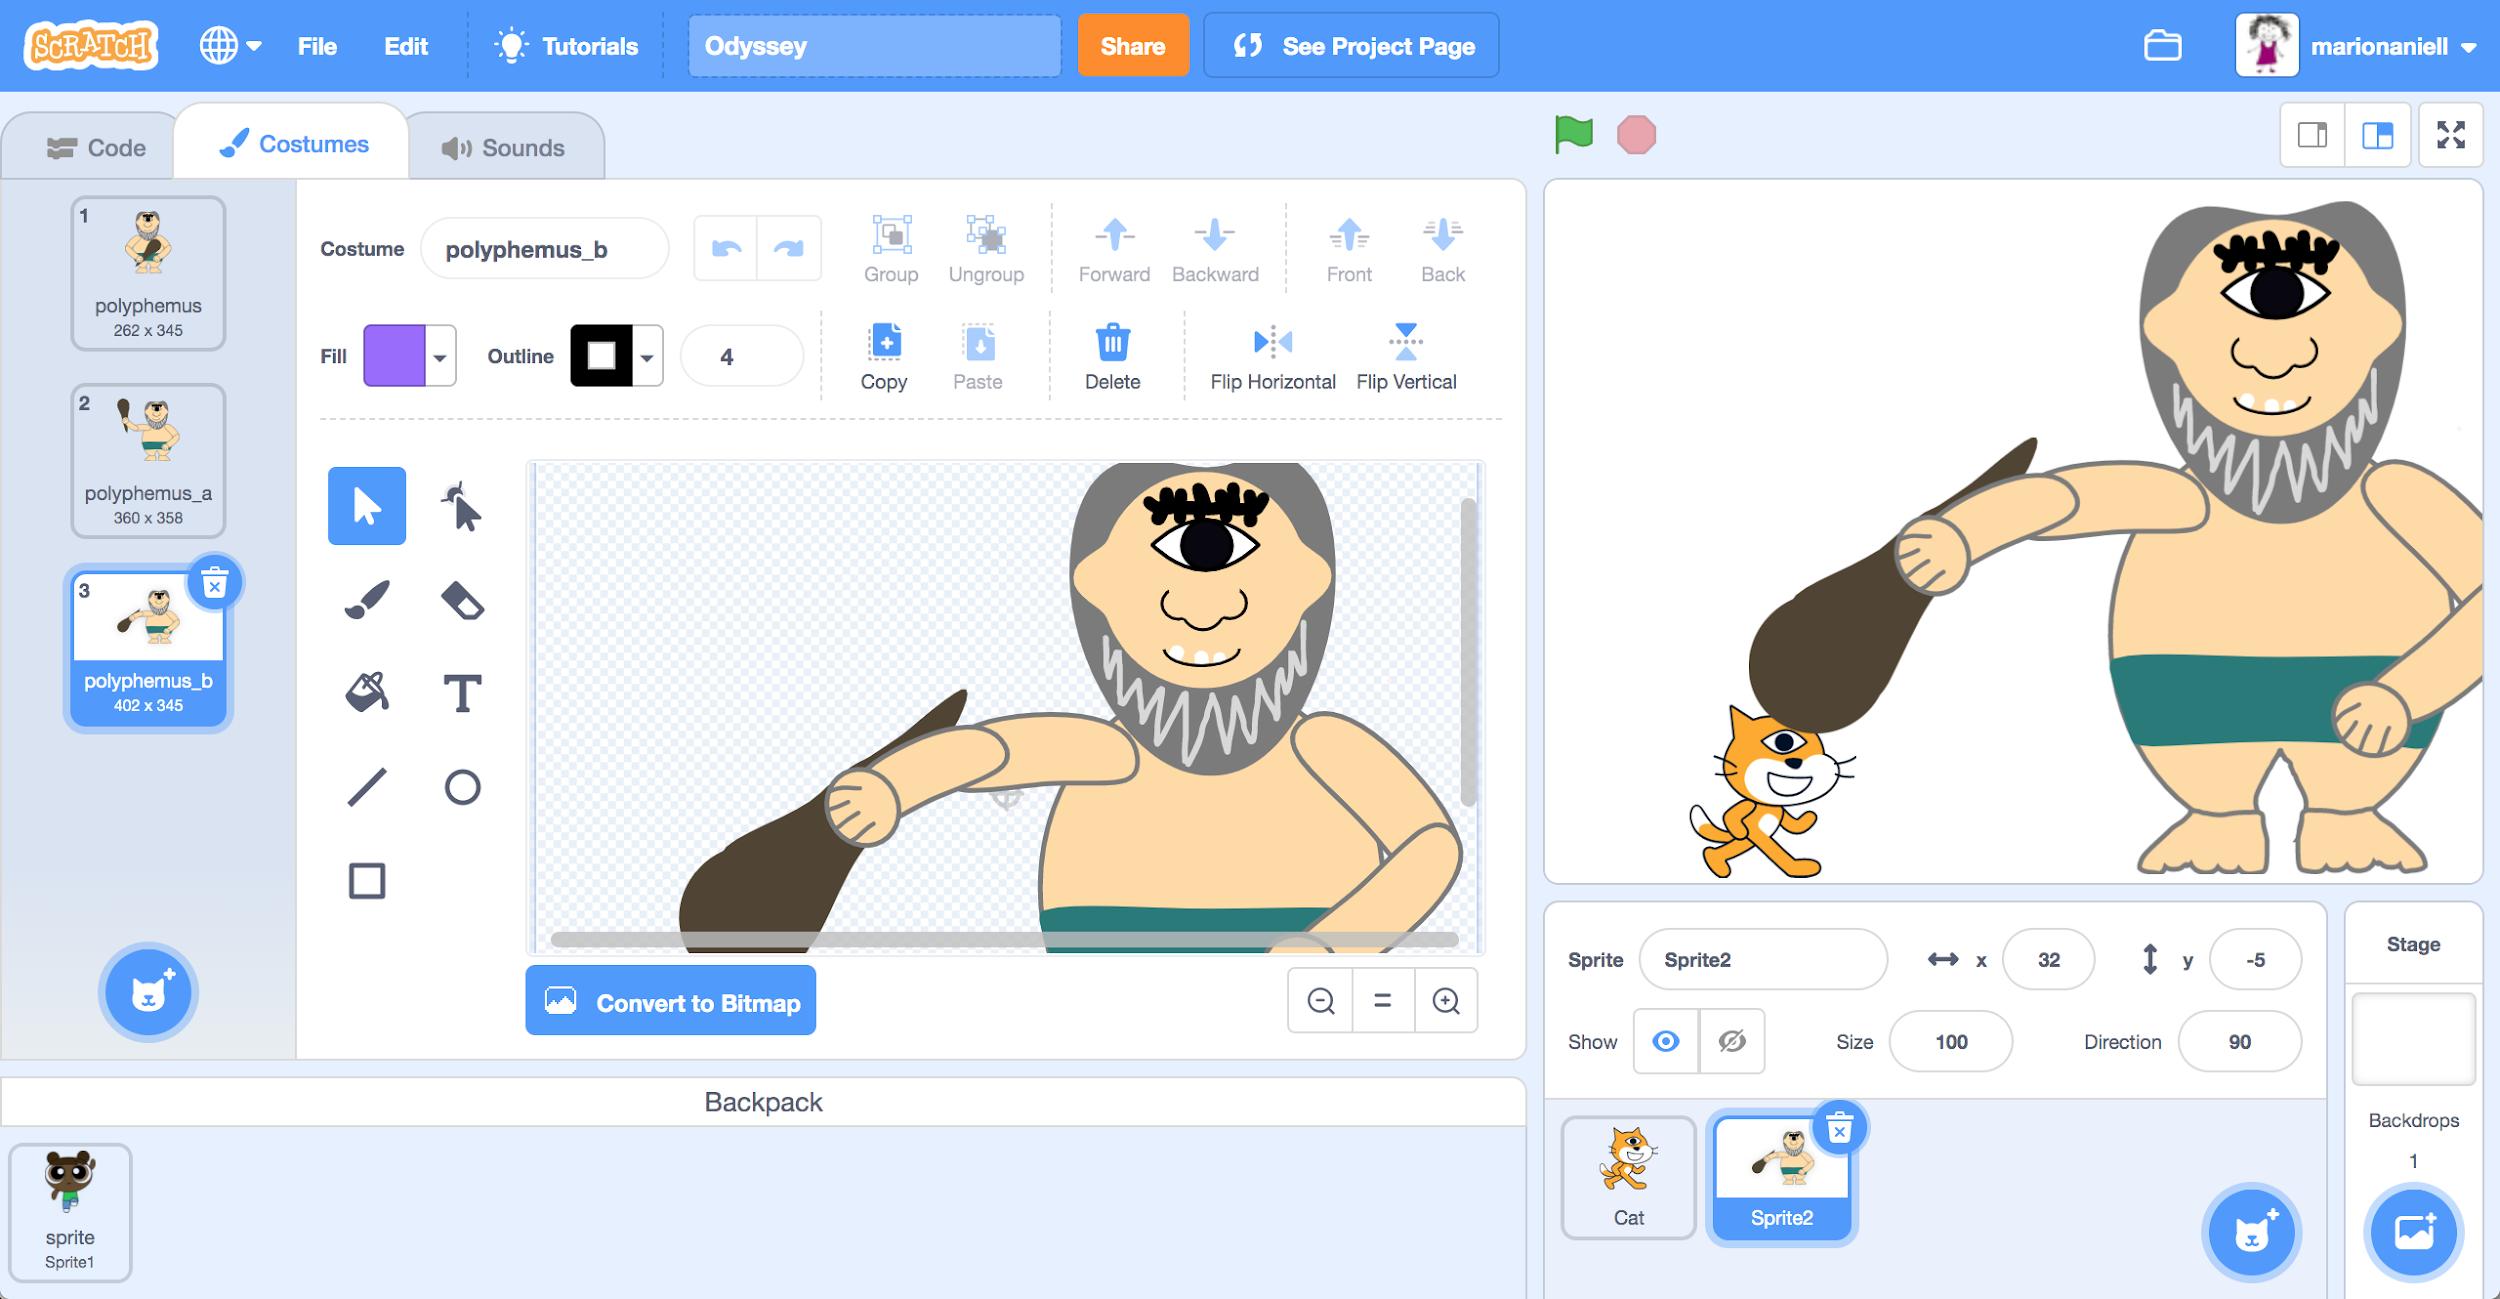
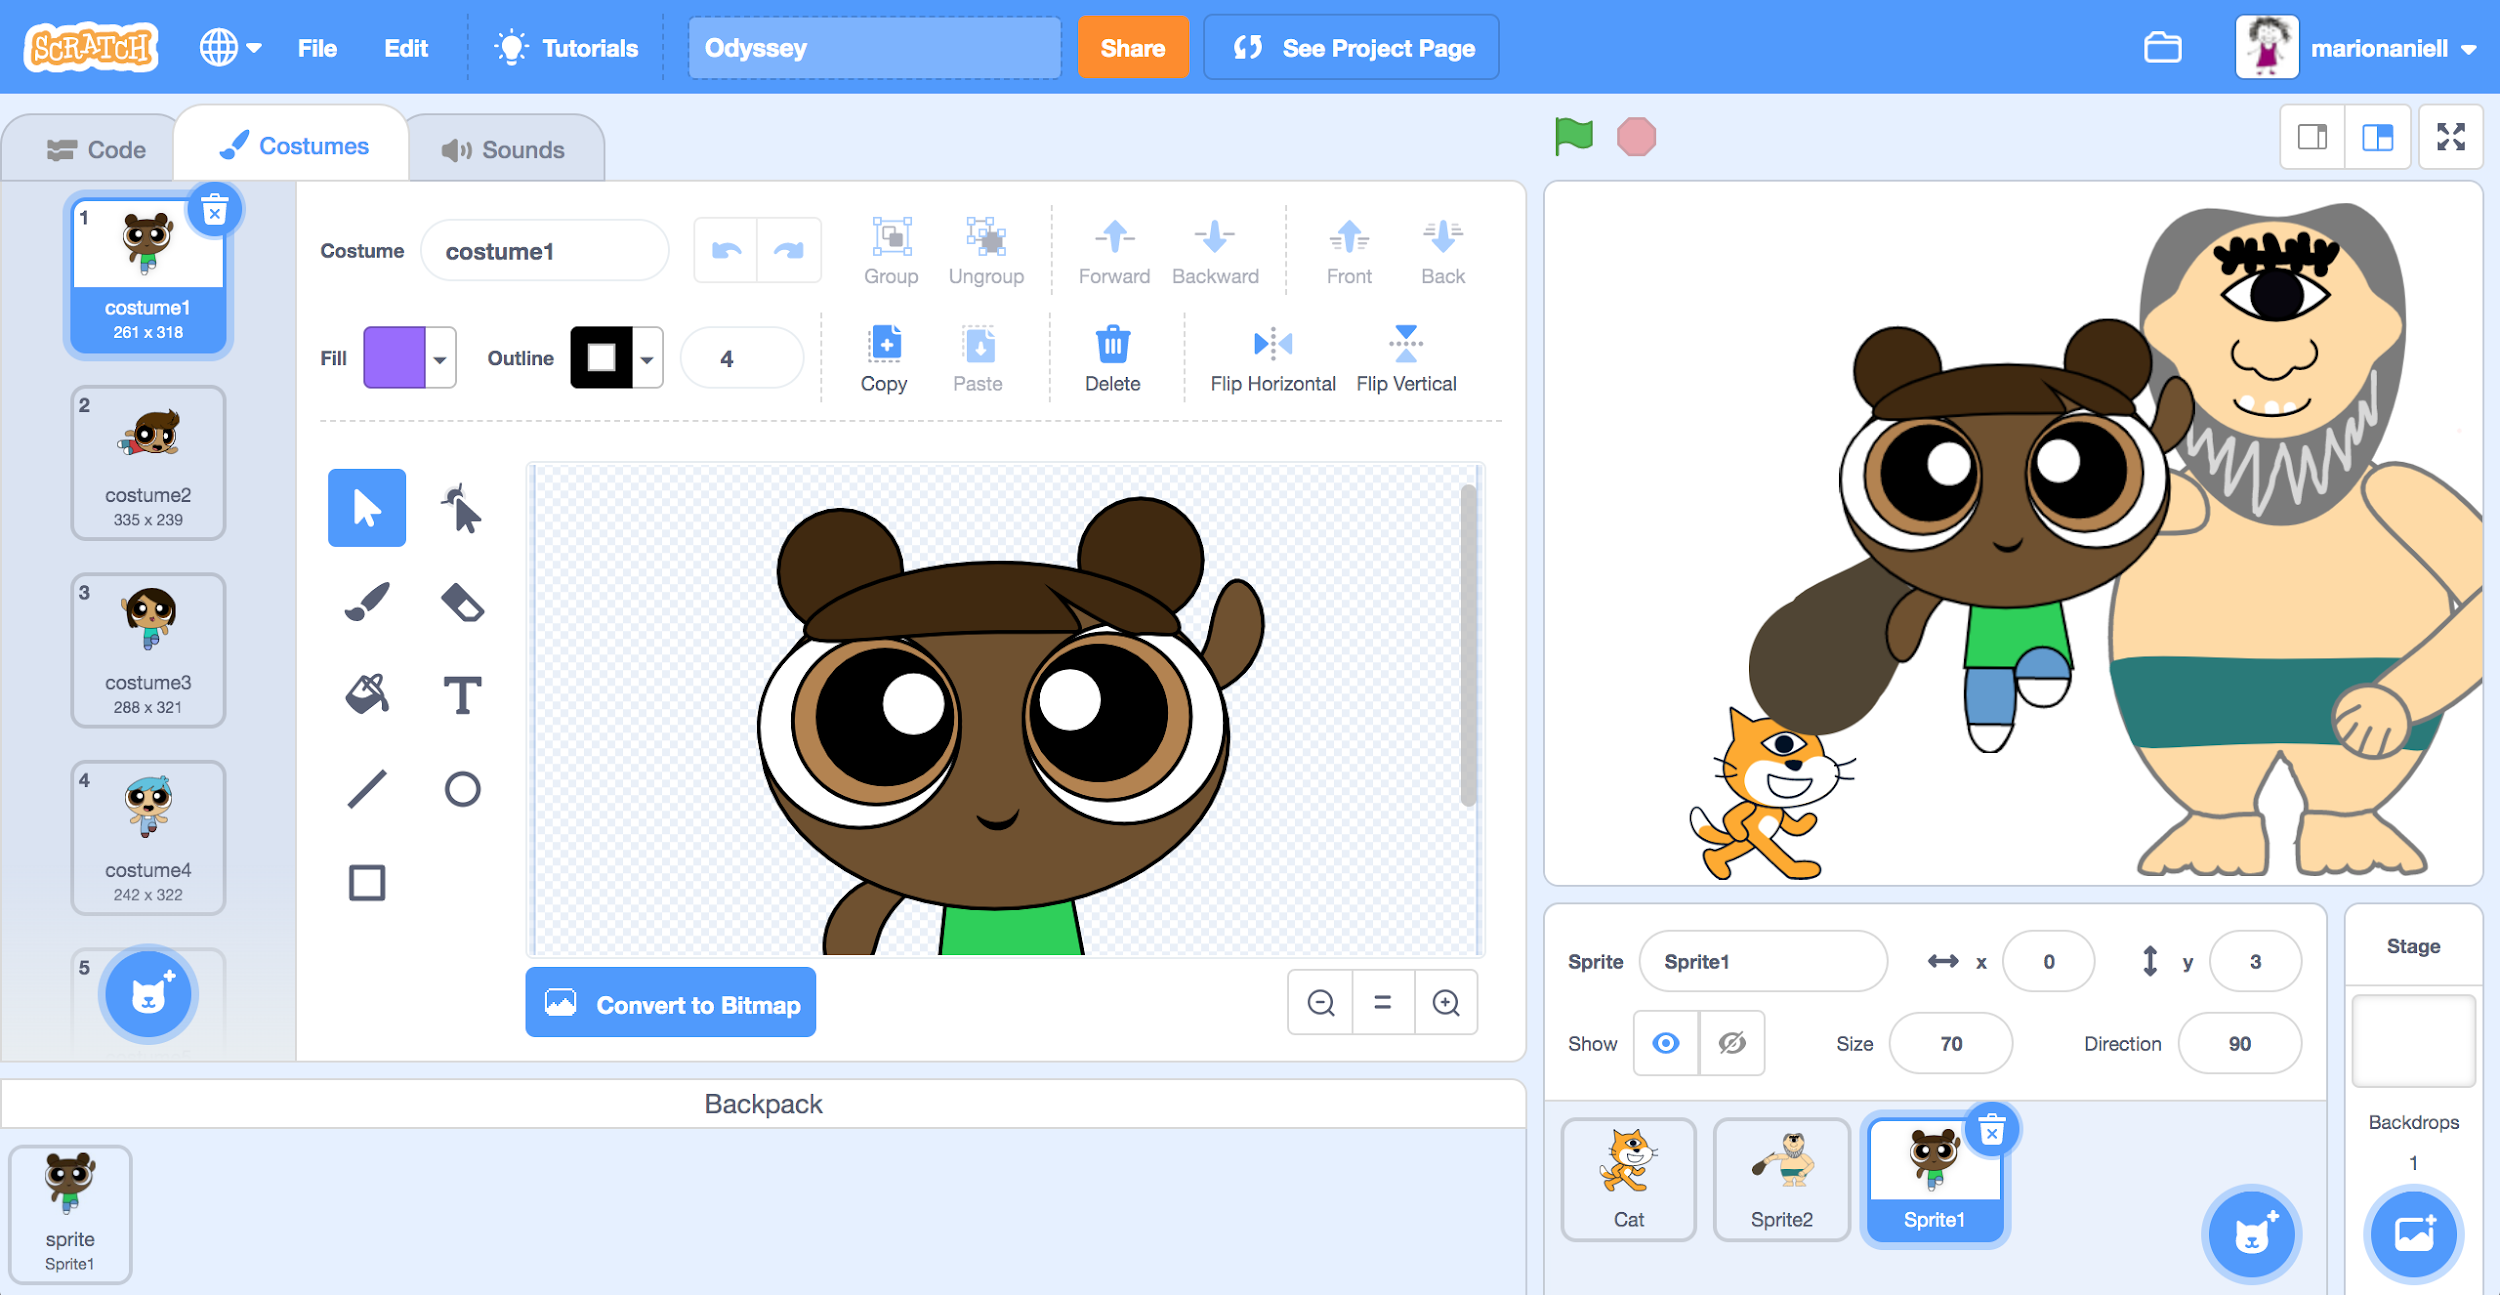
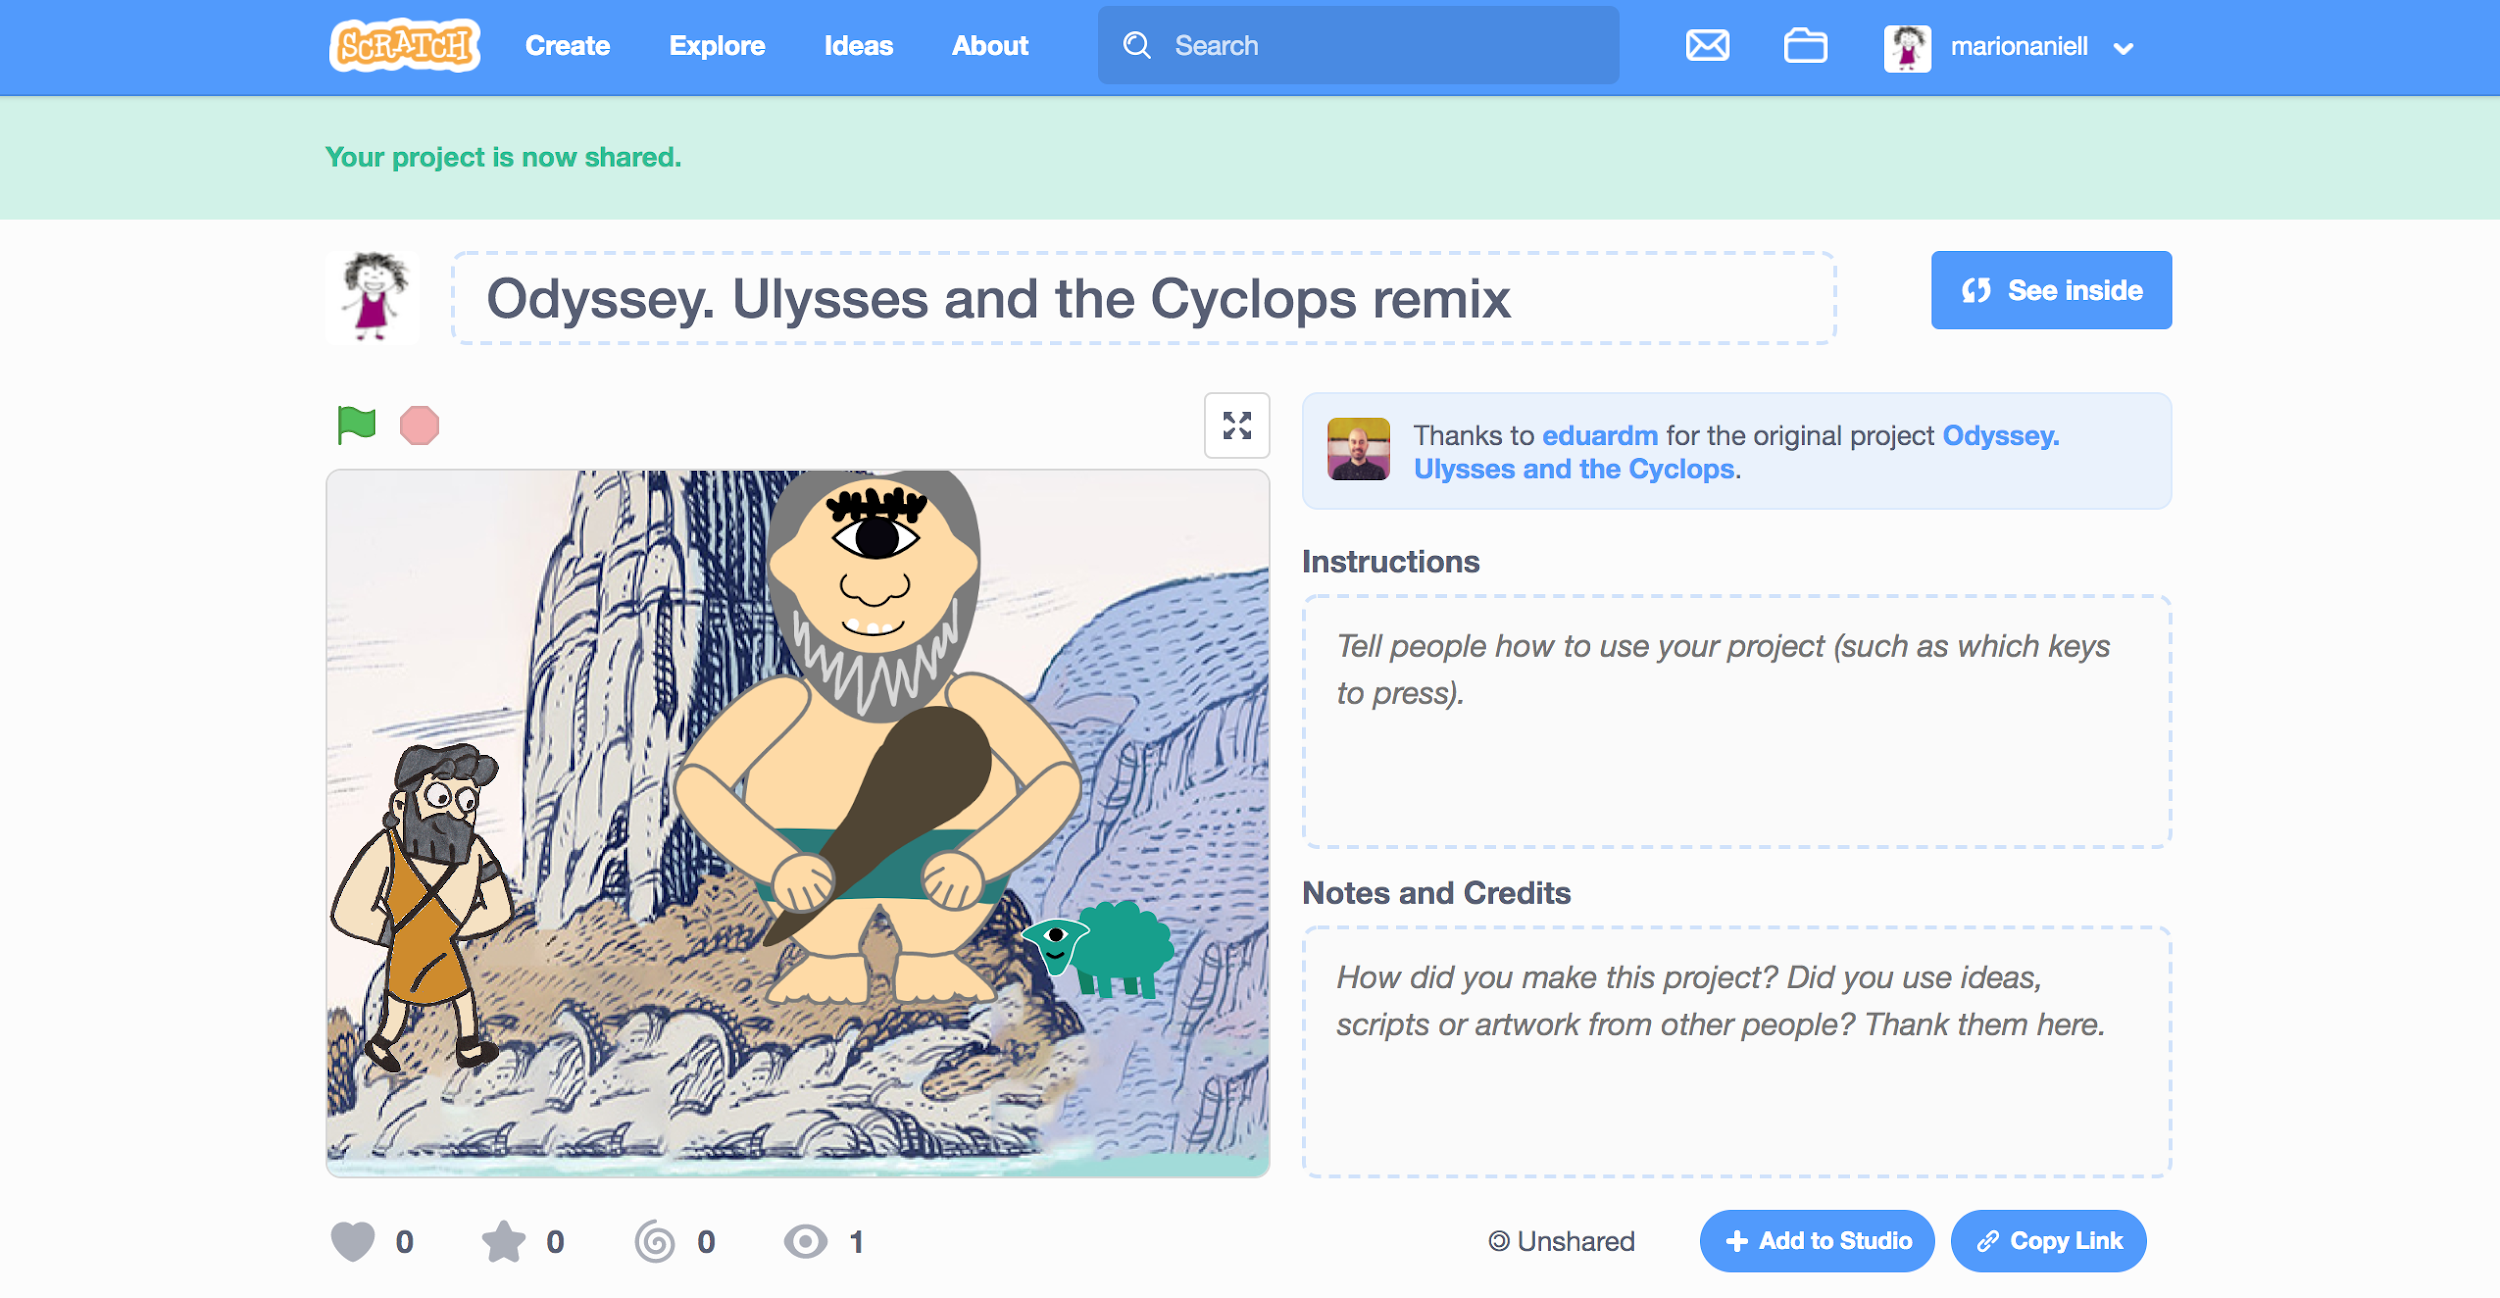
Mariona from team B also created a new sprite (sheep) and also continues the story according the plan, making movements and dialogues for the second scene. When team B finish their part and want their partner to continue the work, they have to click on “Remix” and then click on “share”. When you do this, at the upper part of the window appears this:
And if you click on “See Project Page” button:
Then, team B could add the project to the studio where all projects are.
Now it’s team A turn again. They can take the project of MARIONA as a starting point to continue with their part, modify what they want, add scenes, dialogues, sprites and backgrounds, and at the end, remix and share again.